Lessons from a Flat Tire
It'll happen to you sooner or later.
Lately, I’ve been so consumed with existential threats like nuclear war and food shortages that normal problems are kind of refreshing. Being prepared is about more than stockpiling guns or digging bomb shelters. It’s about being ready for whatever life throws our way.
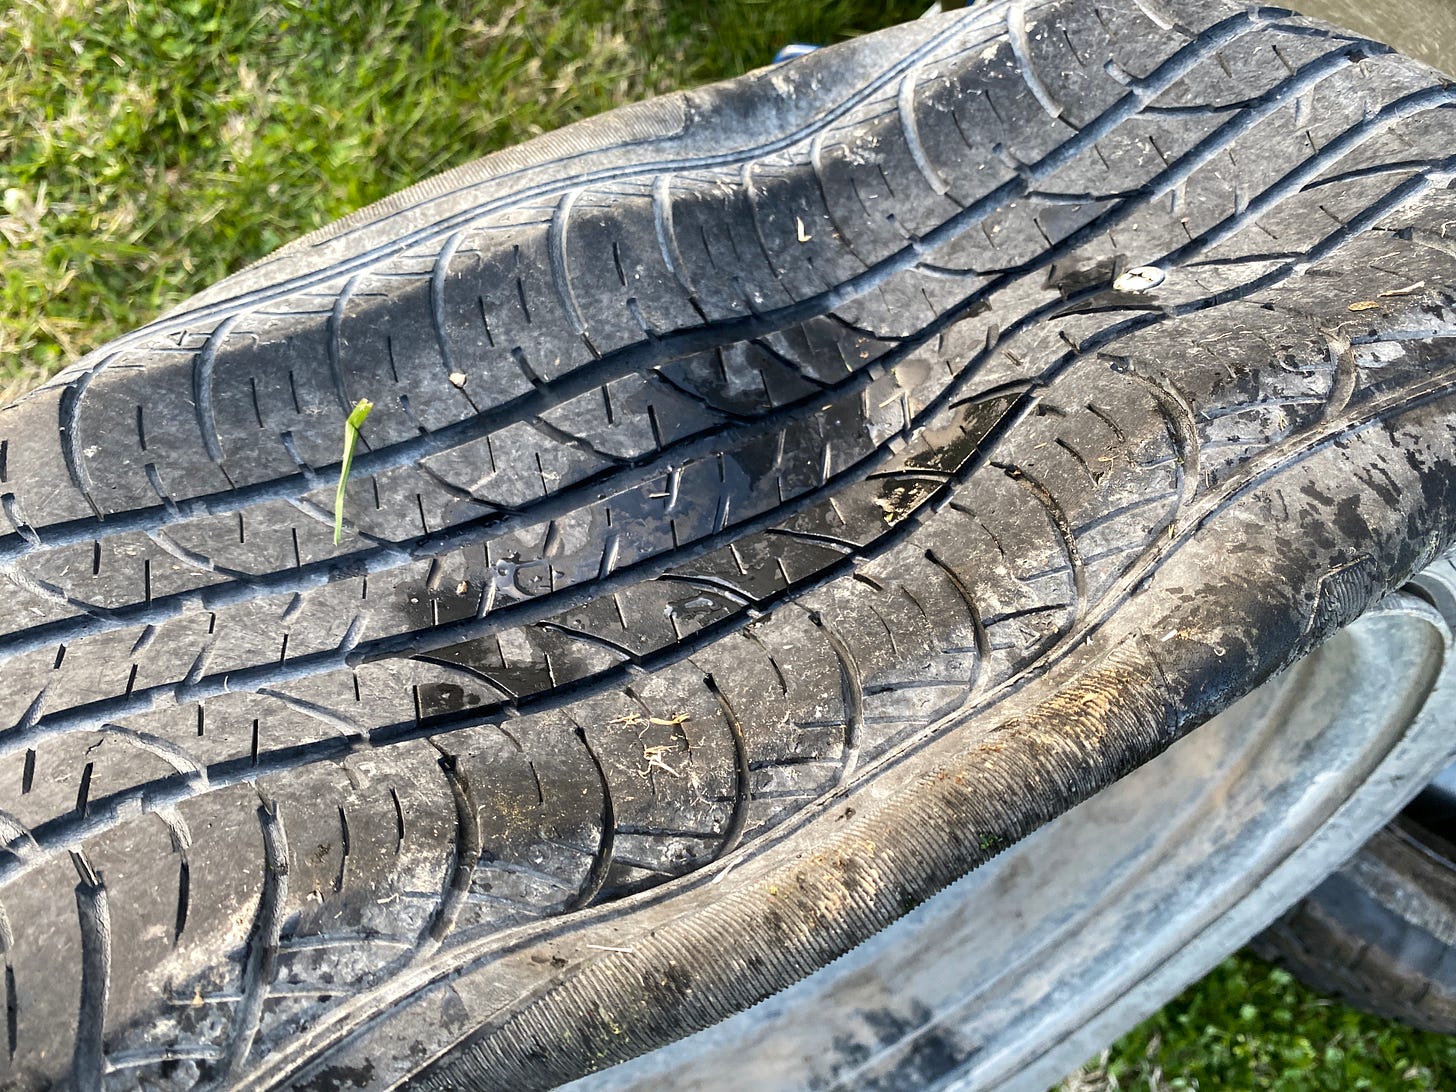
A couple of weeks ago, I walked out of my in-laws’ house, got in my car, and saw that the tire pressure warning light was on. That’s a rare occurrence in my car, so I got out to look at the tires. Sure enough, one of them was flat.
It was late, but thankfully my wife had driven her own car, so I had the luxury of not having to fix it on the spot, which also gave me some time to think about how I’d handle it. I’ve changed flats before, but it had been a while and I wasn’t even sure if the tool in my trunk were usable.
The Full Flat Tire Kit
Want to cut to the chase? Here is the full kit you should keep in your car for dealing with flat tires.
Fix-a-Flat ($8)
Tire Tool ($19)
Scissor Jack ($24)
Air Compressor ($70)
Tire Gauge ($7.50)
PB Blaster ($20)
Sledgehammer ($18)
Phone numbers for roadside assistance, local tow companies, and local emergency responders (police and fire)
Total: $166.50, not including AAA or other roadside assistance. You may also want a pair of work gloves to keep your hands clean.
Fix-a-Flat or Spare?
You should keep a can of Fix-a-Flat in your car for your size of tire. However, while it can quickly get you going, it’s not a panacea. Fix-a-Flat is only good for up to three days or 100 miles, so you need to head to a tire shop ASAP.
Many tire shops refuse to fix tires that have been treated with Fix-a-Flat because it makes a huge mess inside the tire. This means if you use Fix-a-Flat you may have to replace the tire. And you can’t just replace one tire at a time. They have to be replaced in pairs, and if your car is four-wheel drive, they all need to be replaced at once. Fix-a-Flat is convenient, but it could prove costly.
Unfortunately, many new cars don’t include a spare tire at all, so it may be Fix-a-Flat or nothing.
Fix-a-Flat also has a shelf life of about two years, so when you buy a can, you should set a reminder to swap it out. I had a can in my trunk, but I don’t know how old it was. I bought a fresh can on the way back to get my car, but I decided against using it. I wasn’t worried about getting the tire repaired because they were overdue to be replaced anyway, but I knew it would be a couple of days before my tire shop would get the new tires in, so I didn’t want to risk the Fix-a-Flat failing.
If you have the option, a spare tire is always a better solution than Fix-a-Flat, but it’s good to keep a can around in case you’re not in a safe place to change a tire or can’t change it at all for some reason.
Make Sure Your Spare Is in Working Order
There are two parts to this:
Is the spare tire inflated?
Can you actually get to it?
You should check your car tires with a tire gauge once per month, and you should check your spare tire at least twice per year. This also forces you to see if you can actually get to your spare tire.
In my case, the spare was stored in the trunk under a panel. I was able to get to it… after removing a lot of junk from my trunk. The bigger problem was actually getting the tire out. Toyota put in a screw-on cap to hold down the spare tire — which was completely unnecessary because it sits securely in its own little covered well. Unfortunately, that cap was seized onto the thread, and I could only remove it by twisting it with a pair of locking pliers — not a tool usually kept in roadside emergency kits. Best to take care of problems like that before you have a flat.
Make sure your spare is inflated and that you can actually remove it. I threw that cap away because it’s totally unnecessary. But your car may have a more complex mechanism for retrieving the spare. A lot of pickup trucks store the spare under the bed and have a mechanism where you lower the spare with a cable. Those things also tend to seize up with rust. It’d be a good idea to blast it with some PB Blaster once a year. (Wear goggles when you do that.)
Make Sure You Have the Right Tools
If your car has a spare, it should also include a jack and a tire tool. Make sure they’re still there and still work. Maybe consider spraying the jack’s threads with PB Blaster once a year to keep them from rusting.
The included tools usually aren’t great, but they usually work. The scissor jacks automakers include often have a slot that fits with the car’s jack points, which helps keep the jack in place and lets you know where to put the jack. If your jack is missing or nonfunctional, a scissor jack is usually good enough for changing tires. A floor jack is better, but they’re really heavy and not everyone can lift them.
But the included tire tools usually suck. For one, they often fold, which is just asking for an injury. I like a solid four-way tire tool that helps me get good leverage on the lug nuts, and they work on multiple lug nuts sizes for added versatility.
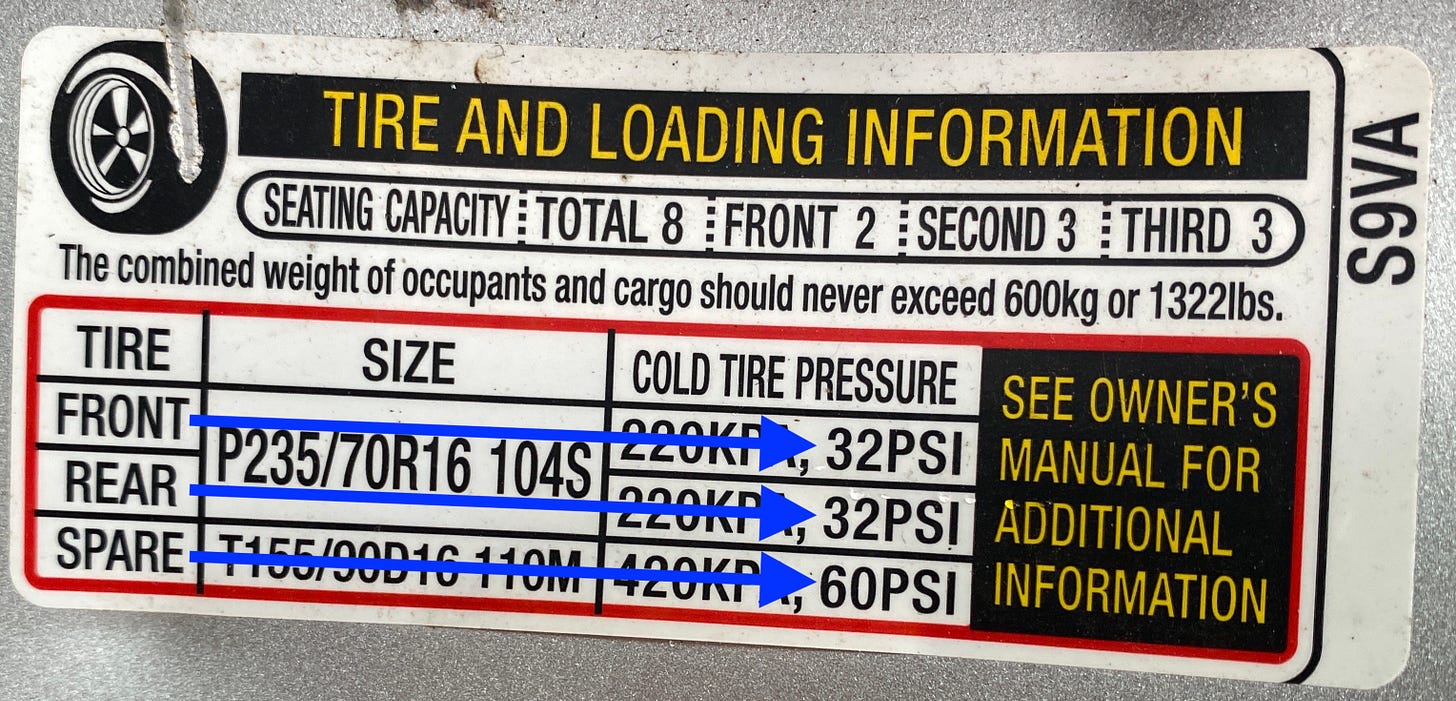
You also want a good air compressor in your car so you can inflate your tires and your spare. Fix-a-Flat is supposed to air up your tire, but sometimes it doesn’t add enough air. You also need a tire gauge so you actually know how much pressure is in your tires. A sticker inside one of your doors should tell you the correct pressure for your regular tires and spare.
I had all the tools I needed… except for one. When I tried to pull the wheel off after jacking up the car, the wheel wouldn’t budge because it was rusted on. The only way I was able to break it free was with a three-pound sledgehammer. Just keep hitting the wheel in a clockwise pattern until it loosens up.
Finally, some cars have special locking lug nuts to discourage theft. They include a special socket you have to use to remove or tighten a special lug nut on each wheel. If you have those (check your manual), make sure you have the special socket. Otherwise, you won’t be able to remove the lug nuts and you’ll have to pay a mechanic to cut them off.
How to Change a Tire
There are lots of good videos on this.
But here’s the general process:
Remove the wheel cover if there is one. It usually just pulls off.
Likewise, if there are any covers on the lug nuts, pull them off.
Take your tire tool and loosen each of the lug nuts on the wheel. Yes, you do this before jacking up the car because if you use a lot of force while the car is jacked up, it may fall off the jack. Don’t remove them entirely, just “crack” them loose. If they won’t loosen, hit them with some PB Blaster and wait a few minutes.
Place your jack under a suitable jack point near the wheel you need to replace. Your owner’s manual might mention specific spots. You want to put the jack under a solid piece of metal, not a piece of trim or an exhaust pipe.
If you have a log or block of wood, put it behind one of the rear wheels to “chock” the wheel and keep the car from rolling back and off the jack.
Work the jack to raise the car. You don’t have to raise it very high to remove the wheel. The tire usually just needs to be an inch or two above the ground.
Important safety tip: Don’t put any body parts under the car and especially under the wheel. There shouldn’t be any reason to while changing a tire.Once the wheel is off the ground, finish removing the lug nuts (just use your fingers).
Pull off the wheel. If it won’t budge, tap it with a hammer to break it free. If one hit doesn’t work, apply additional taps in a clockwise pattern around the wheel.
Put on the spare and finger-tighten the lugs.
Lower the car and put away the jack.
Use your tire tool to tighten the lugs.
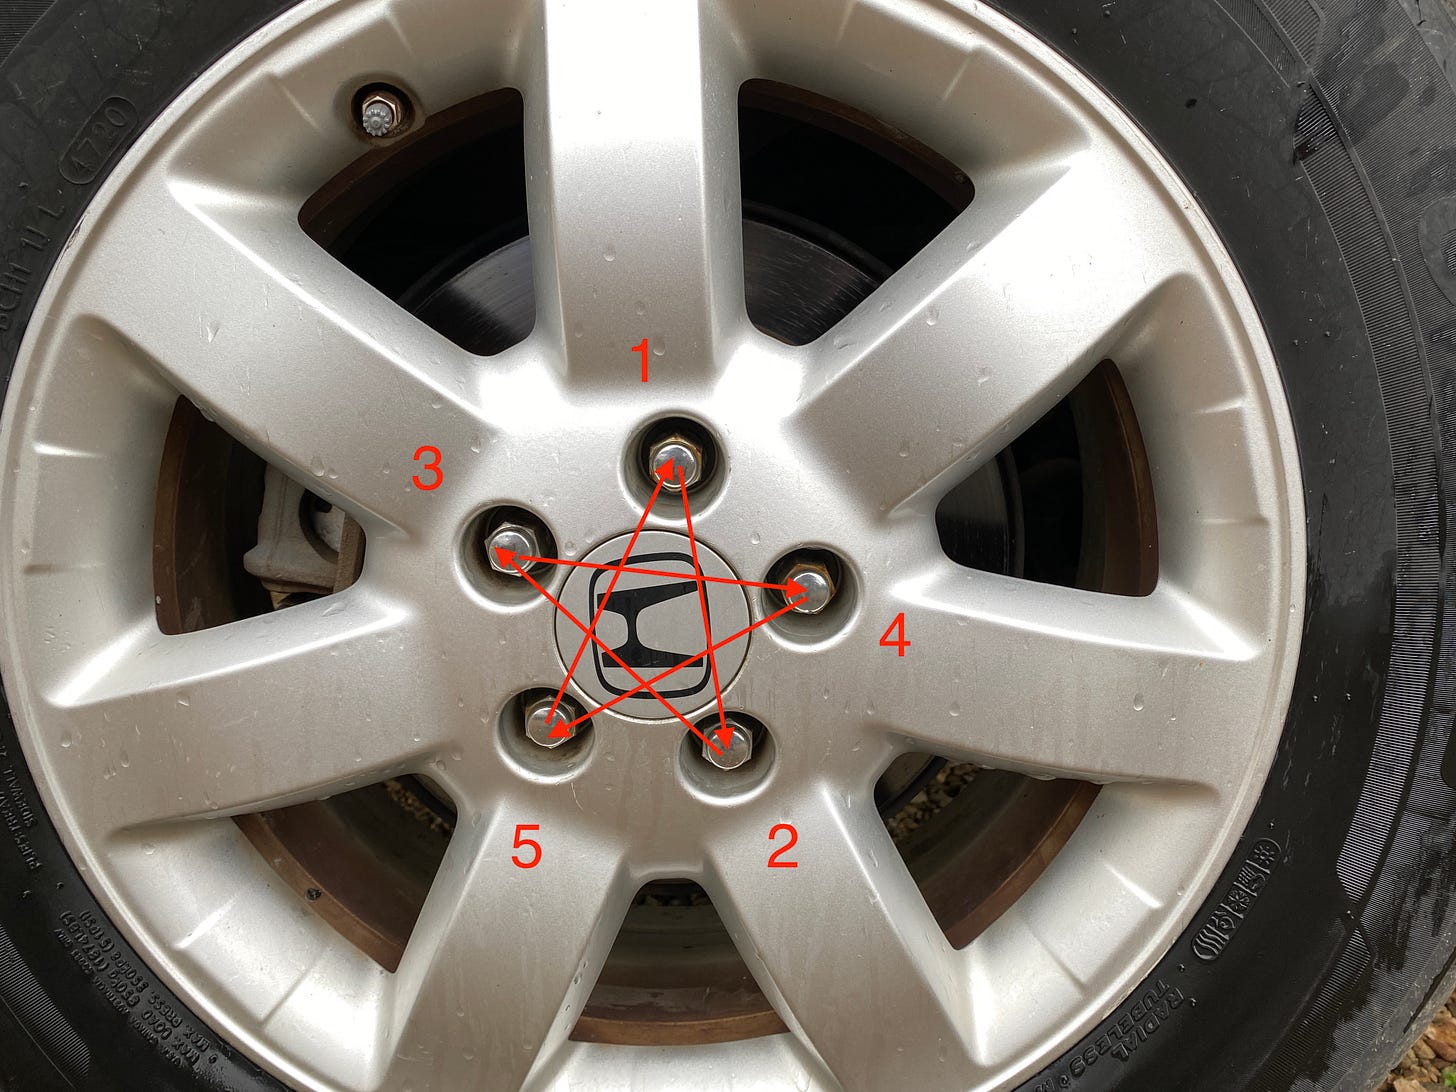
Getting the lugs tight enough is the most important part. You don’t want your spare tire to fall off while you’re going down the road! You want to get the lugs evenly tight by repeatedly tightening them in a star pattern. So if you have the usual five lugs and one is at the top, you’d work like this:
Top lug
Bottom-right lug
Upper-left lug
Upper-right lug
Bottom-left lug

And keep repeating this pattern until you can’t get the lugs to move anymore. You’ll probably find that when you return to the first lug, it’s not as tight as you remember it. As you tighten some lugs, it effectively loosens others, which is why we keep rotating in a star pattern.
Ideally, you would finish tightening each lug nut with a torque wrench to get it to the specified tightness in foot pounds (Haynes and Chilton's manuals usually have these specifications). I realize you probably won’t buy a torque wrench to keep around just in case, but hats off to you if you do.
Have a Backup Plan
For whatever reason, you may not be able to change the tire or the Fix-a-Flat may not work. In that case, you may have to call for help. It’s good to have numbers for local towing companies and emergency services programmed in your phone, but it’s also good to have a national toll-free number you can call while traveling.
The classic answer is AAA, which offers roadside assistance with your membership, which starts at $70 per year. But it may not be necessary. Your credit card or cellular carrier may offer some sort of roadside assistance services, possibly for an additional charge. Look into that and make sure to have the number programmed into your phone.
When to Replace Your Tires
The best way to avoid flat tires is to replace them when the time is ripe. How can you tell?
Look for telltale cracking in the sidewall. Even tiny cracks indicate dry rot, which means the tire needs to be replaced.
Check the tread depth. The proper way to do this is with a tread depth gauge. Replace the tread when it’s at or below 2/32 of an inch.
Another way to check tread depth is to put a penny head-down in the tire tread. If Abe’s head is entirely visible, it’s time to replace the tire.
When you check the tread depth, make sure to check multiple spots around each tire, because they don’t wear evenly.


One thing that I have in my kit that isn't on your list is a tire plug kit. If you're carrying an air compressor it makes a lot of sense to add it. I've been able to remove a nail and plug the hole, then re-inflate and be on my way without getting the jack out and the tire off.