


Start Seeds for Your Victory Garden Now
Start growing your own food today from the comfort of your home.

Many of you have told me you’re tired of reading about nukes, and frankly, I’m tired of writing about them. So here’s a nice breather about something also urgently important. Alas, I must finish what I started. The next — and hopefully final — nuclear war post is coming soon.
Worried about rising food prices? Here’s what to do about it: Start some seeds. Do it now. The season is ripe, food ain’t getting cheaper anytime soon, and being able to transform seeds into edible plants will put you on a path to greater resilience. The first step is to master transforming a seed into a plant, and you can do it in your home.
(Actually, last month would have been an even better time to start seeds, but this publication didn’t exist yet. We’ll remind you next February.)
You don’t even need a garden bed yet. Start your seeds and figure it out after you manage to get plants to germinate. If nothing else, give your plants to friends who garden. Or enemies who garden. Seeds are cheap, small plants are expensive. Pennies vs. dollars. You might even be able to sell your plants.
The Food Resilience Triad
Storing food is only the first step to food supply resilience. Eventually, that food will run out. Meet what I call the Food Resilience Triad:
Store food
Grow food
Preserve food
In case of a long-term emergency, your stored food will hopefully buy you time to start producing your own. And once you produce your own, you need to then know how to maximize its shelf life to survive the winter. If that seems like a lot, it is, which is why we’re taking baby steps.
“But I Don’t Have a Green Thumb!”
You don’t have a thumb problem, you have a “not killing enough plants” problem. Gardening takes a lot of trial and error. Books and YouTube videos can only take you so far. Getting your hands dirty and failing repeatedly is the only way to truly learn. All the more reason to start today.
The secret to good gardening is timing. Knowing when to start seeds at what point in the season. And you can only learn that through practice and attuning yourself to nature’s clock.
Some people have the opposite problem: they think growing food is easy. Some preppers buy big cans of survival seeds, put them on a shelf, and forget about them, not realizing that seeds have a limited shelf life. And again, growing food takes time to learn, and you don’t want to be learning while the stuffing is hitting the fan.
Some preps may make you feel silly, like buying potassium iodide tablets and never needing them (at least they’re cheap). The worst-case scenario with gardening is you gain a new, useful, and socially acceptable hobby.
So you have no excuse to not get started. Starting seeds is easy, quick, and — in the long run — cheap.
Starting Seeds Indoors vs. Outdoors
There is vigorous debate over whether it’s better to start seeds inside and transplant them to the garden later or sow them directly in a garden bed outside. John Jeavons, the author of How to Grow More Vegetables, recommends transplanting seeds. Steve Solomon, author of Gardening When It Counts, says to sow directly as much as possible since the resulting plants will be hardier.
Neither one is wrong, but I’ve never noticed a difference in the finished product. Every gardener has strong opinions on methods. Figure out what works best for you.
Many regard transplanting seeds as a more advanced technique, but I think it’s great for beginners:
Trays, lights, and seeds are a pretty small investment in the long run.
It takes away the mystery. Sometimes you plant seeds in a garden, nothing ever sprouts, and it’s impossible to figure out why. Too cold? Bad seeds? Ants ate them? That doesn’t happen with transplants.
If you’re new, you probably can’t tell the difference between a weed and what you’re trying to grow. When you put a young plant in the ground, you know exactly what it looks like and where it is.
Starting seeds and then transplanting them lets you always have a fresh batch ready to go. Worried about a crop failure? Start more seeds and have fresh plants ready to rock.
It gives you a jump on the growing season. It’s about the only way to grow tomatoes in the United States since they want a long, hot season. You can start cool-weather plants like cabbage in the cold of winter and have them ready to go when it starts warming up.
“What Do I Grow?”
Whatever you want! As long as it starts from a seed. The point of this exercise is to get some plants going, and most plants are useful in some way. But if you’re itching to grow food, there are two criteria for determining what to plant: goals and season.
In terms of goals, we can split food plants into two categories: nutrition and calories.
When you’re starting out, nutrition is a good focus. Buying and storing calories is easier and more cost-effective than growing them, and it takes a lot of land to grow a lot of calories. But a fresh salad with crisp lettuce and juicy tomatoes would be a nice break from beans and rice.
I classify “nutrition” crops as things that are high in vitamins and minerals but won’t necessarily fill your stomach. Things like:
Lettuce
Kale
Onions
Parsley
Tomatoes
Garlic is another good one, but it doesn’t grow from seeds. Instead, you stick garlic cloves directly into the ground. You can use the ones you buy at the store. Try it! It’s one of the easiest things you can grow.
Calorie crops are plants that you can eat as staples. But you have to plant a ton of them:
Beans (green or shell)
Pumpkin
Squash
“What about corn?” Doesn’t transplant well. Potatoes are a near-perfect food, but they don’t usually start from seed.
One of my favorite crops that you can start indoors is cabbage since it can be both. A fried head of cabbage is a meal on its own. Ferment that head of cabbage into sauerkraut and you have a nutritional powerhouse loaded with vitamin C and probiotics. Ferment some Napa cabbage with garlic, ginger, radish, and spices and you get kimchi, which is practically a medicine.
The trouble with cabbage is it doesn’t do well in the heat. And it gets hot here in Tennessee. It took me years to figure out how to grow it.
Remember what I said about timing being everything? Late last summer I decided to grow a kimchi garden. I transplanted some napa cabbage in August. By September, bugs had destroyed every bit of it.
I was furious, but I started more cabbage and transplanted it in late September. By then it was still warm enough for the cabbage to grow but the bugs had died back. That crop was a huge success and the fridge was packed with kimchi all winter.
Timing Your Seeds
Last month, I started cabbage and kale. I could have started lettuce too. It’s March in Tennessee and I’m about to start cilantro, more lettuce, marigolds, and tomatoes. Around April I’ll start cucumbers and squash.
I can’t tell you when to plant what where you live. That’s going to depend on your USDA hardiness zone. Type your address into that map, click the dot on the map, and it should tell you what zone you’re in. Remember your zone, because it’s key troubleshooting information. Many seed vendors offer planting dates based on your zone. You can also refer to a planting calendar that tells you when to start seeds indoors based on your location.
It’s important to know if a plant enjoys hot weather or cooler weather. Plants like lettuce and all brassicas (broccoli, cabbage cauliflower, kale, etc.) prefer cool weather. When it gets hot, they get bitter as they release a long flowering stalk (called “bolting”) and “go to seed” (start releasing seeds you can save for next year’s crop). Cool-weather plants also can tolerate frost to a point.
Hot-weather plants include things like squash and tomatoes. Too many cool days can stunt their growth, and they don’t tolerate any amount of frost.
To successfully start these plants at the right time, you have to think ahead. You want to start cabbage when it’s freezing outside. You want to start tomatoes when it’s warming up but still cool. Many of us (myself included) have a bad habit of not thinking about the garden until warm spring weather comes in.
Always start more seeds than you think you’ll need. Seeds are cheap and the garden seasons are short. If some plants fail, you’ll have backups to get rolling again before the season passes.
Gear You Need
Starting seeds is incredibly simple, but it’s easy to screw up. You’re going to need a few things:
Seeds
Seed starting mix (NOT potting soil, NOT garden dirt, NOT compost)
Plant trays (WITHOUT drain holes!)
Total: About $75, including a couple of cheap seed packets. But everything else other than the seeds should last you a long time, and you’re saving money over buying seedlings.
For seeds, just run into a store and buy whatever looks good to you, keeping the current season in mind. You can never go wrong with lettuce. I buy a lot of my seeds from Baker Creek and Johnny’s, but anything you buy at the store, even the dollar store, should be fine for now. Even those mystery seeds from China turned out to be fine. (People ordered seeds from China, they took months to arrive, people forgot about them, and they freaked out in post-COVID panic.)
I can’t emphasize the seed starting mix enough. Anything else may prevent your seeds from growing. Even the fussiest, most self-sufficient gardeners tend to buy it because making a good seed starting mix is hard.
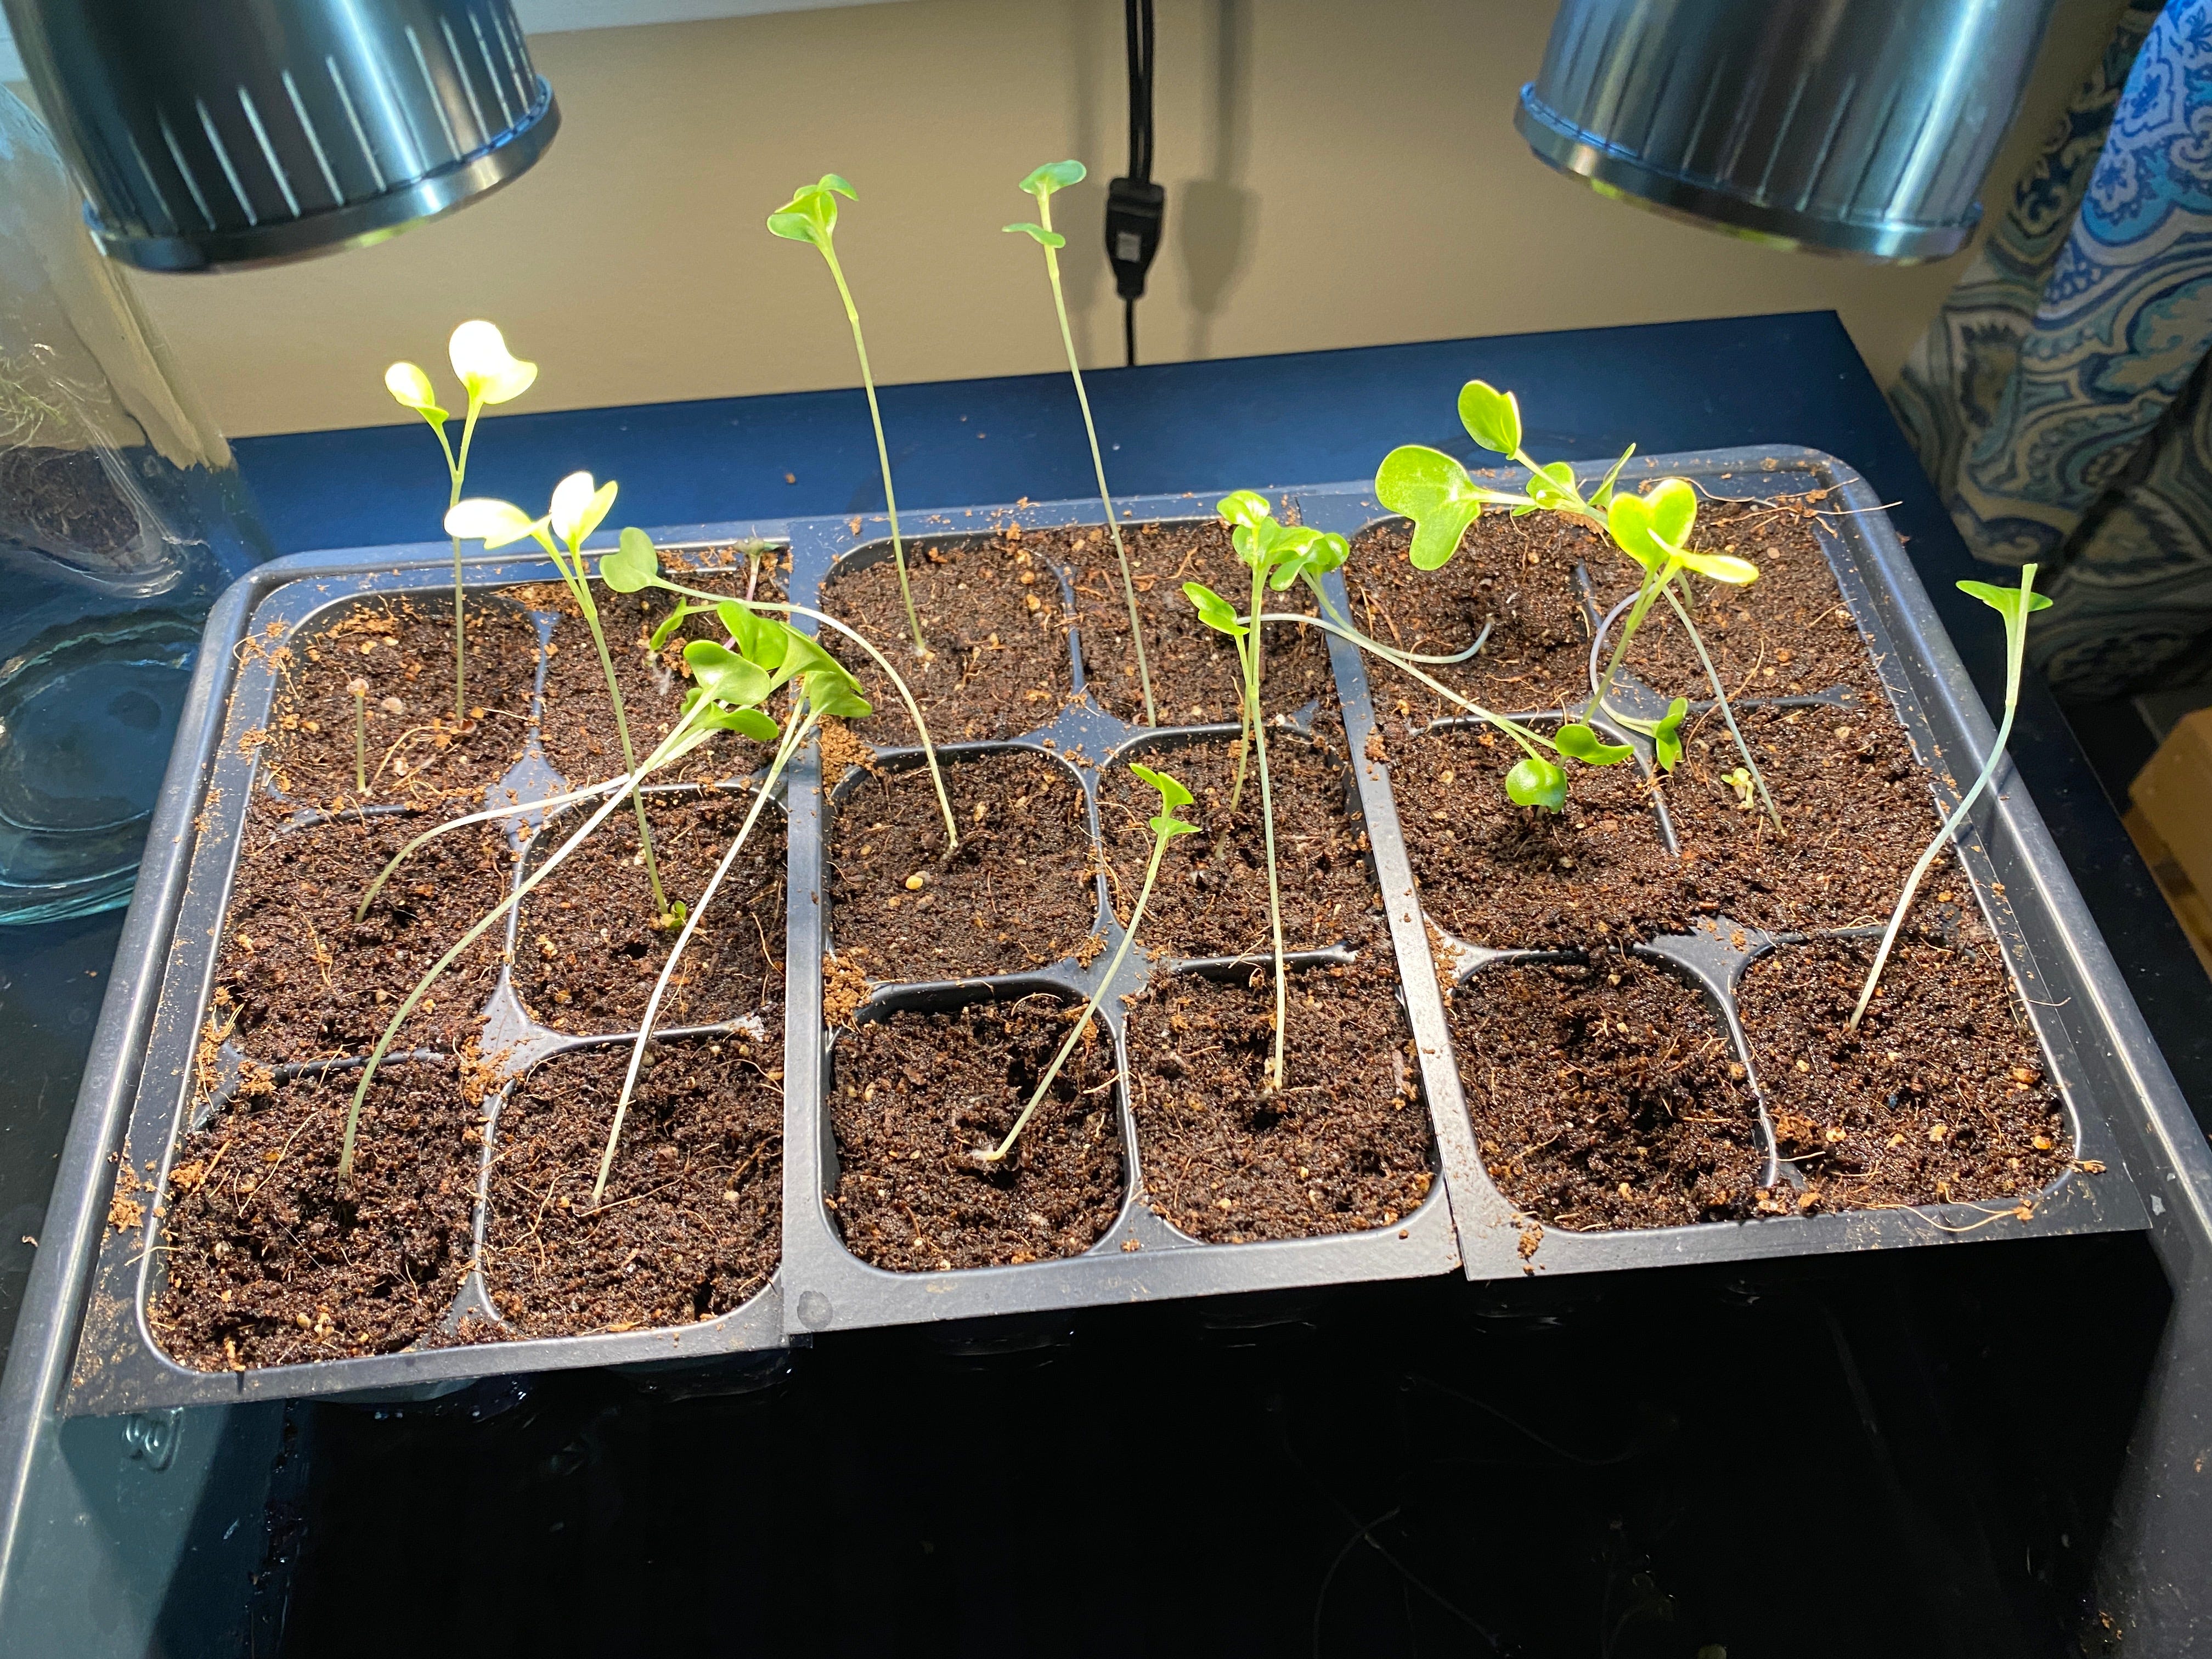
A note on the seed trays. If you go to a store, you’ll see enormous 36- or 72-cell trays and they may seem like a better deal. But if you go to a nursery, you may notice they sell all of their plants in six-cell trays. Why? Because they’re easier to divide and handle.
For example, I’ve started both tomatoes and cabbage in one of those 72-cell monsters. Cabbage needs to be planted months before tomatoes, so I end up dragging the entire giant tray outside, exposing my tomatoes to the cold. Plus those huge trays are floppy and hard to carry. (Granted, my main problem was poor timing.)
If you buy one of those big seed trays and it comes with a clear plastic dome to put on top of the tray, do yourself a favor and throw it away. The idea is that they create a greenhouse environment that helps seeds germinate faster. The reality is they help breed damping-off disease and you’ll wake up one morning to find your seedlings all beheaded as if they were visited by the Highlander.
You can save money on trays by using old egg cartons instead. It’s a pain but it works. I learned this by accident when my three-year-old filled an egg carton with seed-starting mix. I shrugged, said “what the hell,” and got him to drop some kale seeds into the egg carton and left it open under the Philips Hue Lightstrip in our kitchen. What do you know, they germinated and I’ve since transplanted them to a garden bed.
The reason I don’t like egg cartons is there’s no easy way to water them from the bottom, which is essential to consistent seedling growth. The problem with watering seedlings from the top is… water is heavy. And little seedlings are fragile. It’s very easy to crush or drown plants by watering them that way. So we want to start with moist soil and then add more moisture from the bottom and let it seep up.
There’s a reason the little black seed trays are the gold (black?) standard. Burpee makes reusable seed trays, but they’re expensive. I own one but haven’t used it yet. The black trays are reusable if you’re patient enough (and soak them in bleach water to disinfect them).
Setting Up Your Trays
Here’s how to load your seed trays:
Boil some water.
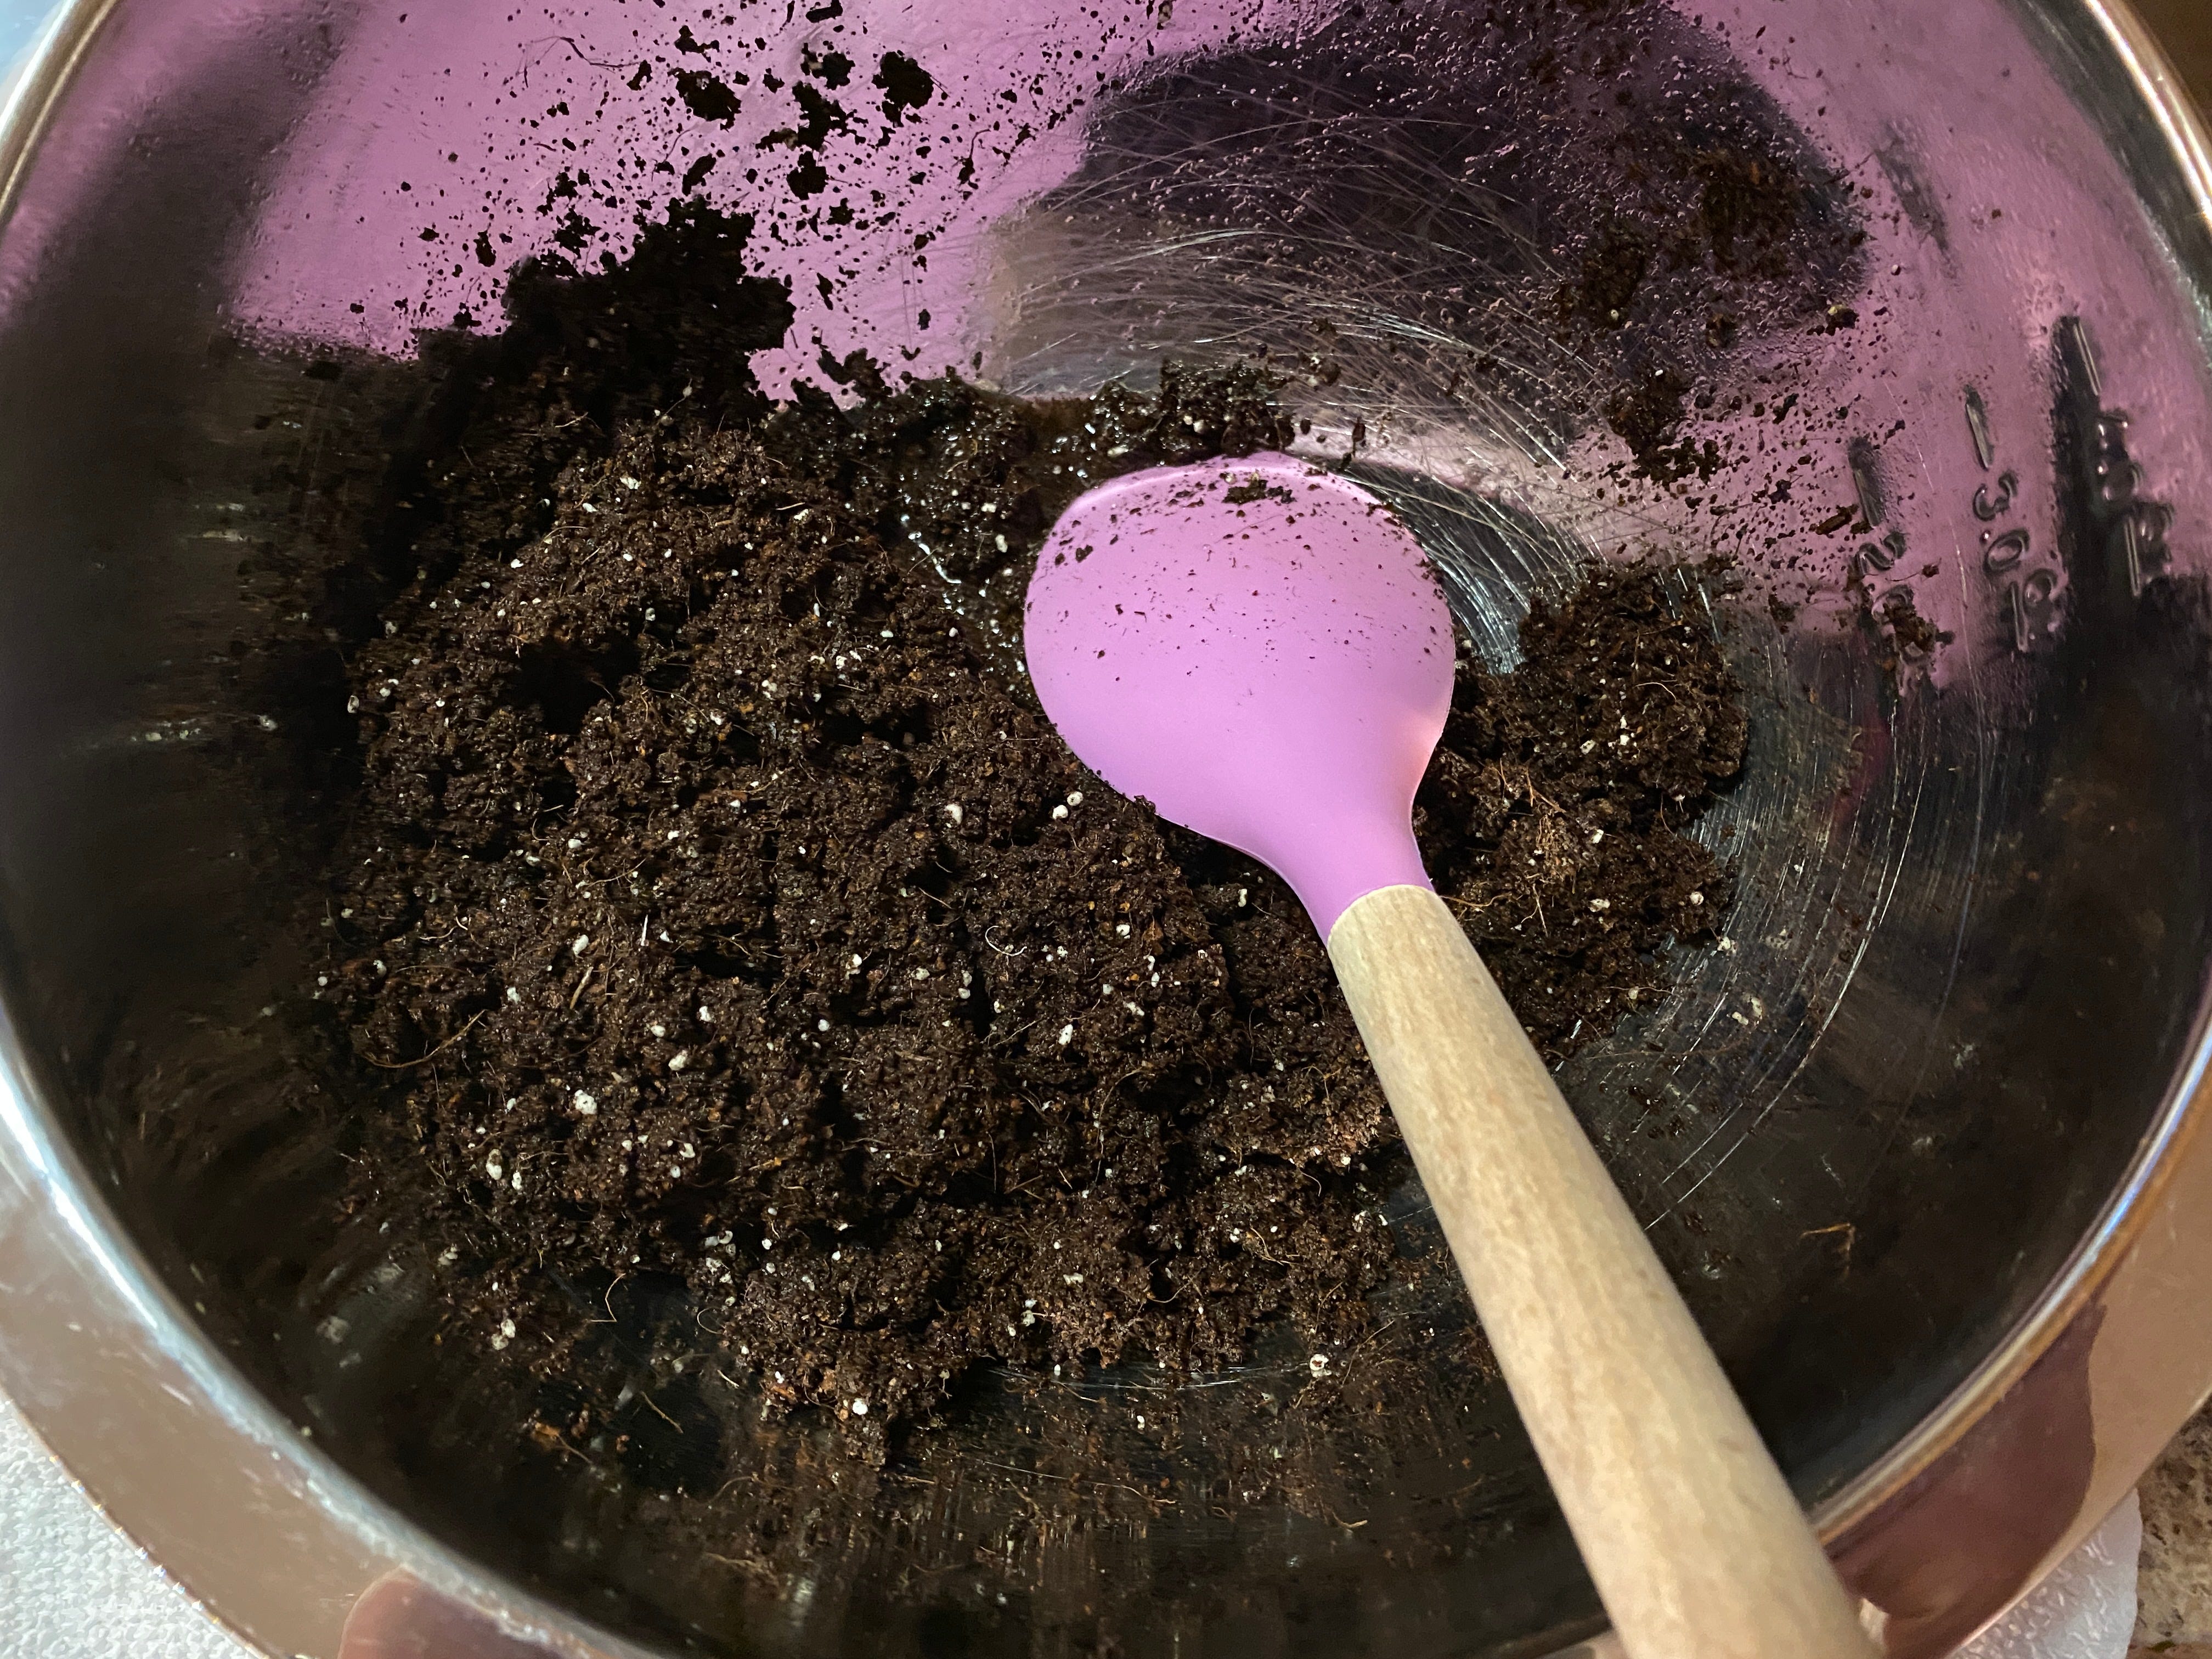
Scoop out a couple of cups of your starter mix into a bowl.
Pour a little of the boiled water into the mix.
Stir.
Repeat until the mix is good and moist but not soggy.
This does a few things:
Makes the starting mix easier to handle and surprisingly less messy, since it sticks to itself.
Pre-moistens the mix so the seeds are entering a nice, moist environment.
Warms the mix so the seeds are more likely to germinate.
Boiling water kills off any pathogens in the mix.
After the seeds are planted, we’re going to put all of the seed trays into the plant tray, and then we’re going to partially fill the plant tray with water so the soil mix and plants soak up water through the bottom of the seed trays — via those little holes. They’ll always have just enough water and won’t be crushed by a deluge.
Now:
Let the mix cool before you handle it, so you don’t burn yourself.
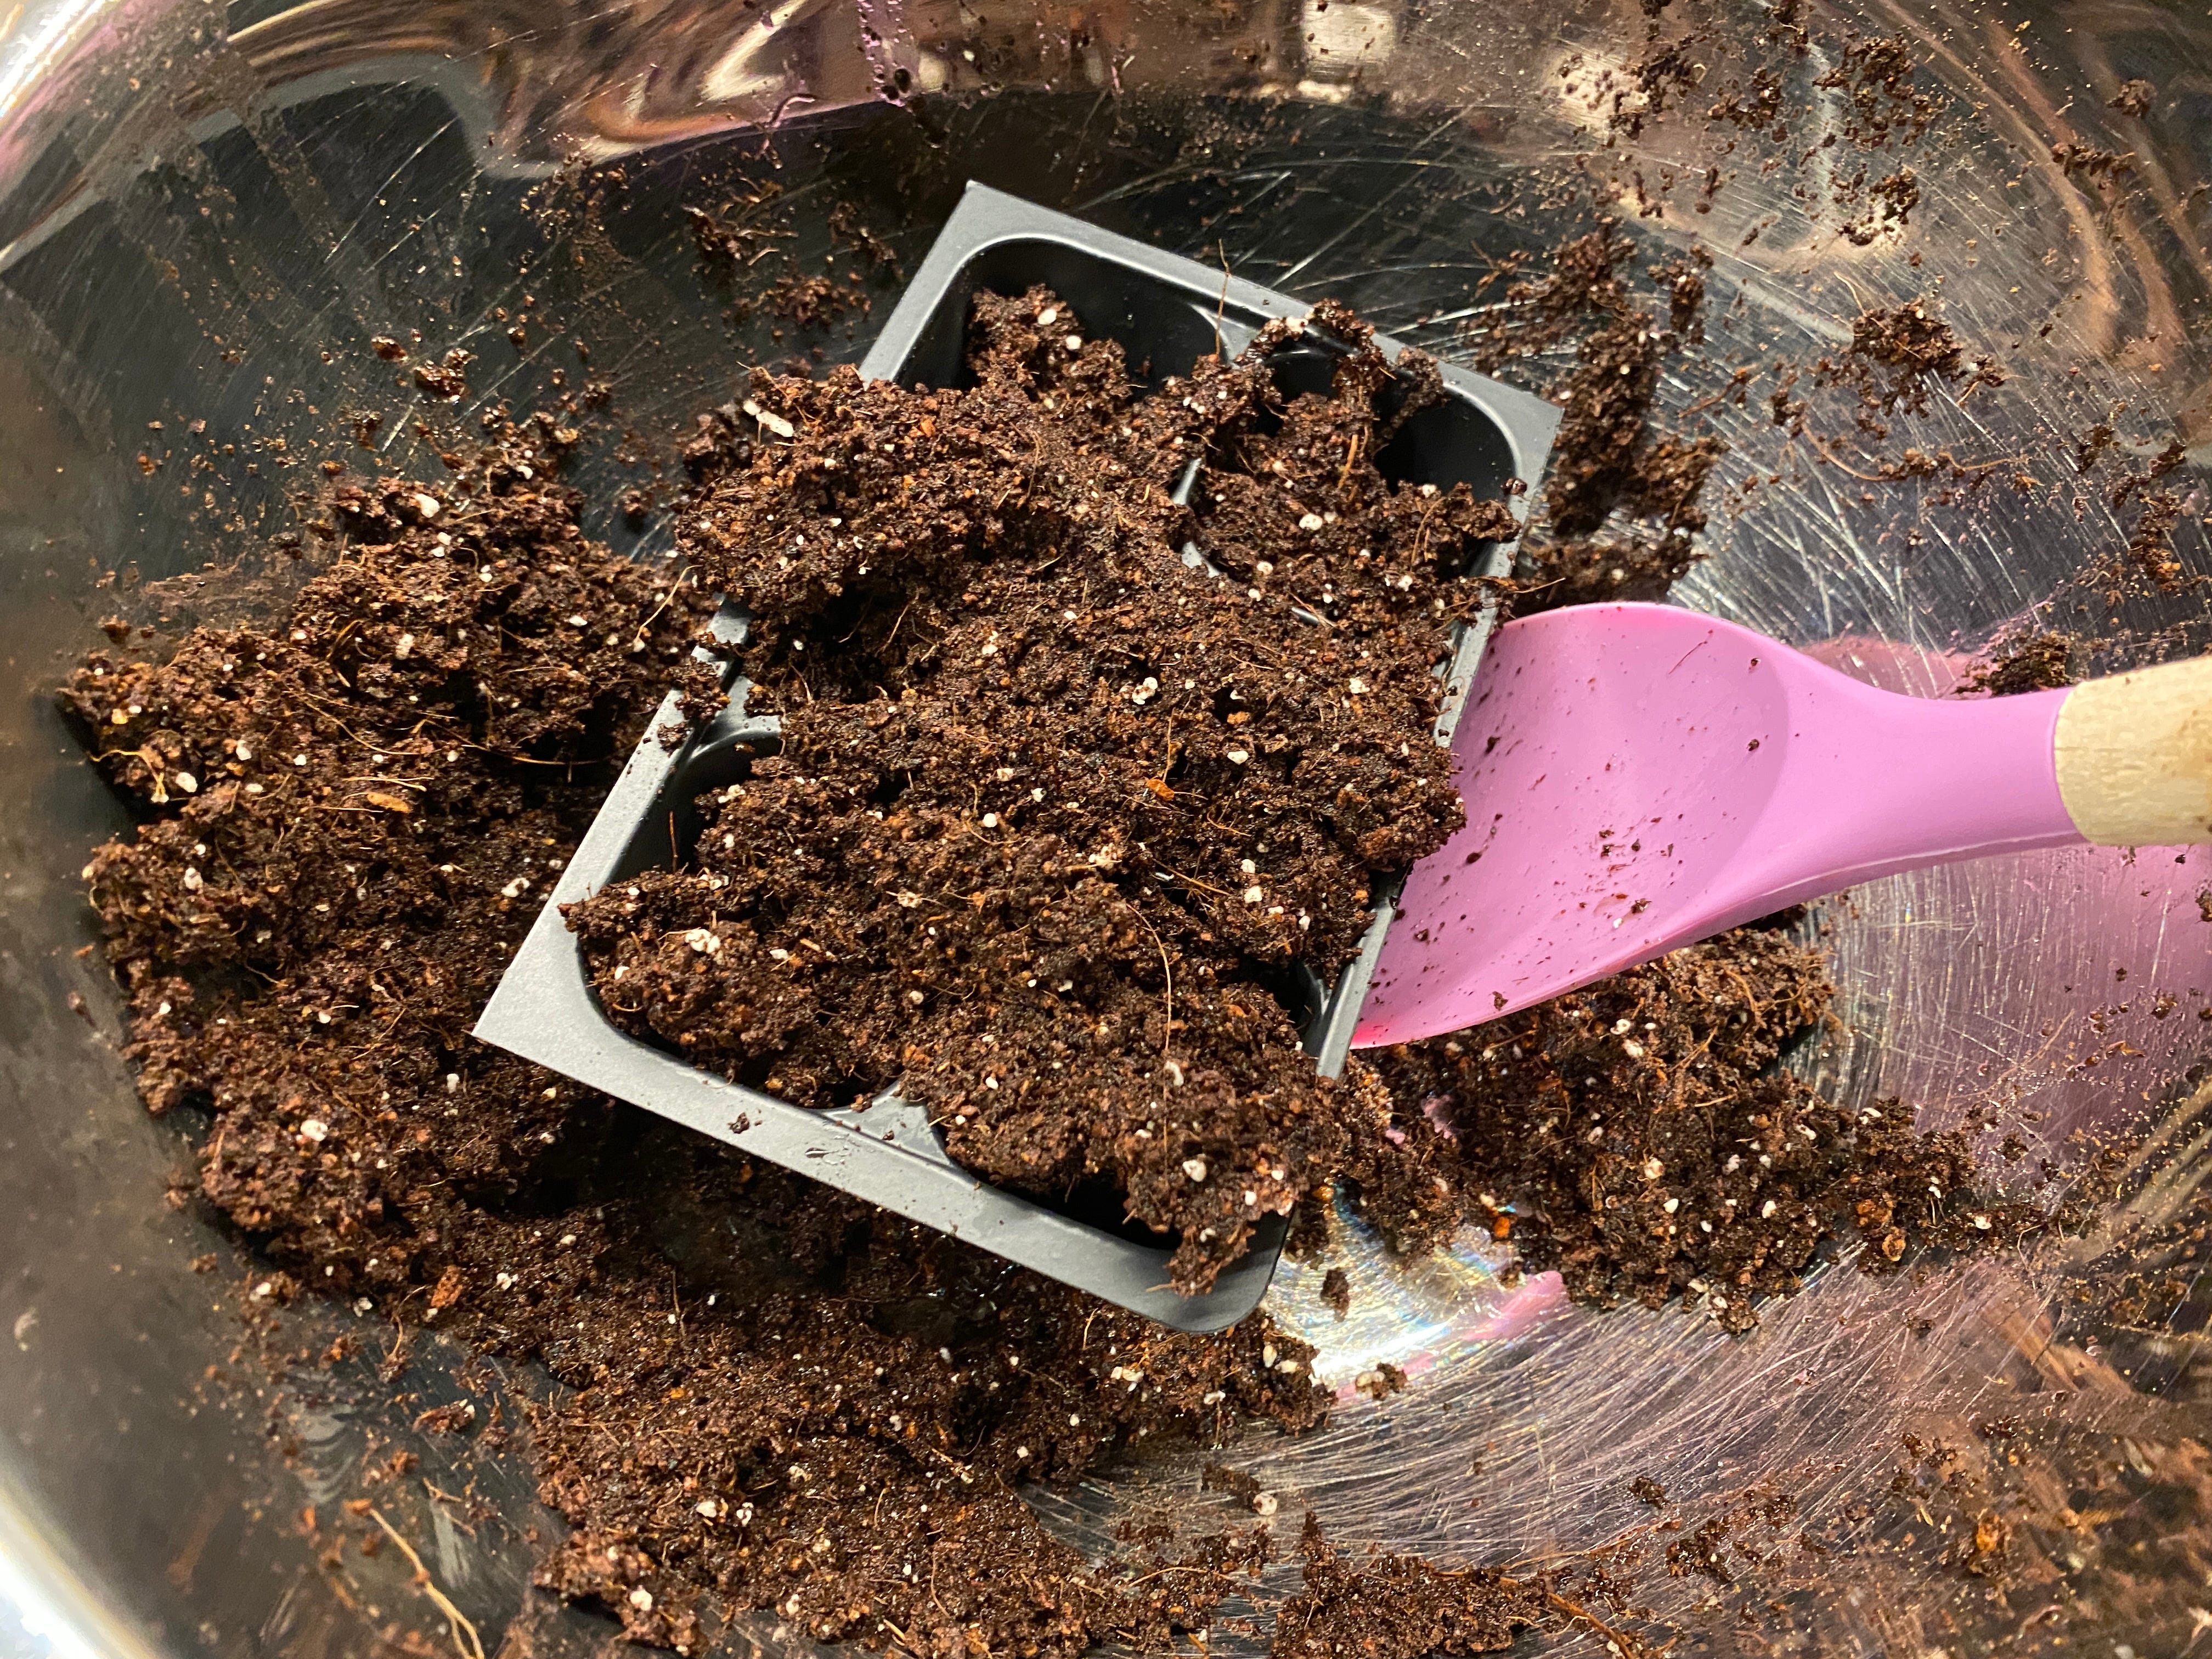
After it’s cool, put some seed trays in the big plant tray, which helps cut down on the mess.
Take out your moist mix and fill the little seed trays.
Lightly pack in the mix, run your hand across the top to smooth out the tops of each cell and you’re golden.
Planting the Seeds
Another common newbie mistake: planting too deep so that the plant can never emerge. For tiny seeds like cabbage and lettuce, I take a tiny pinch of seeds and sprinkle them over each cell and press them into the soil slightly with my finger so they have good soil contact. Just leave them right on the surface, they’ll germinate just fine.
For larger seeds, like cucumber and squash, I push them in, tip down, into the soil until the end of the seed is just flush with the top. Again, we’re ensuring good soil contact while giving the embryonic plant a fighting chance.
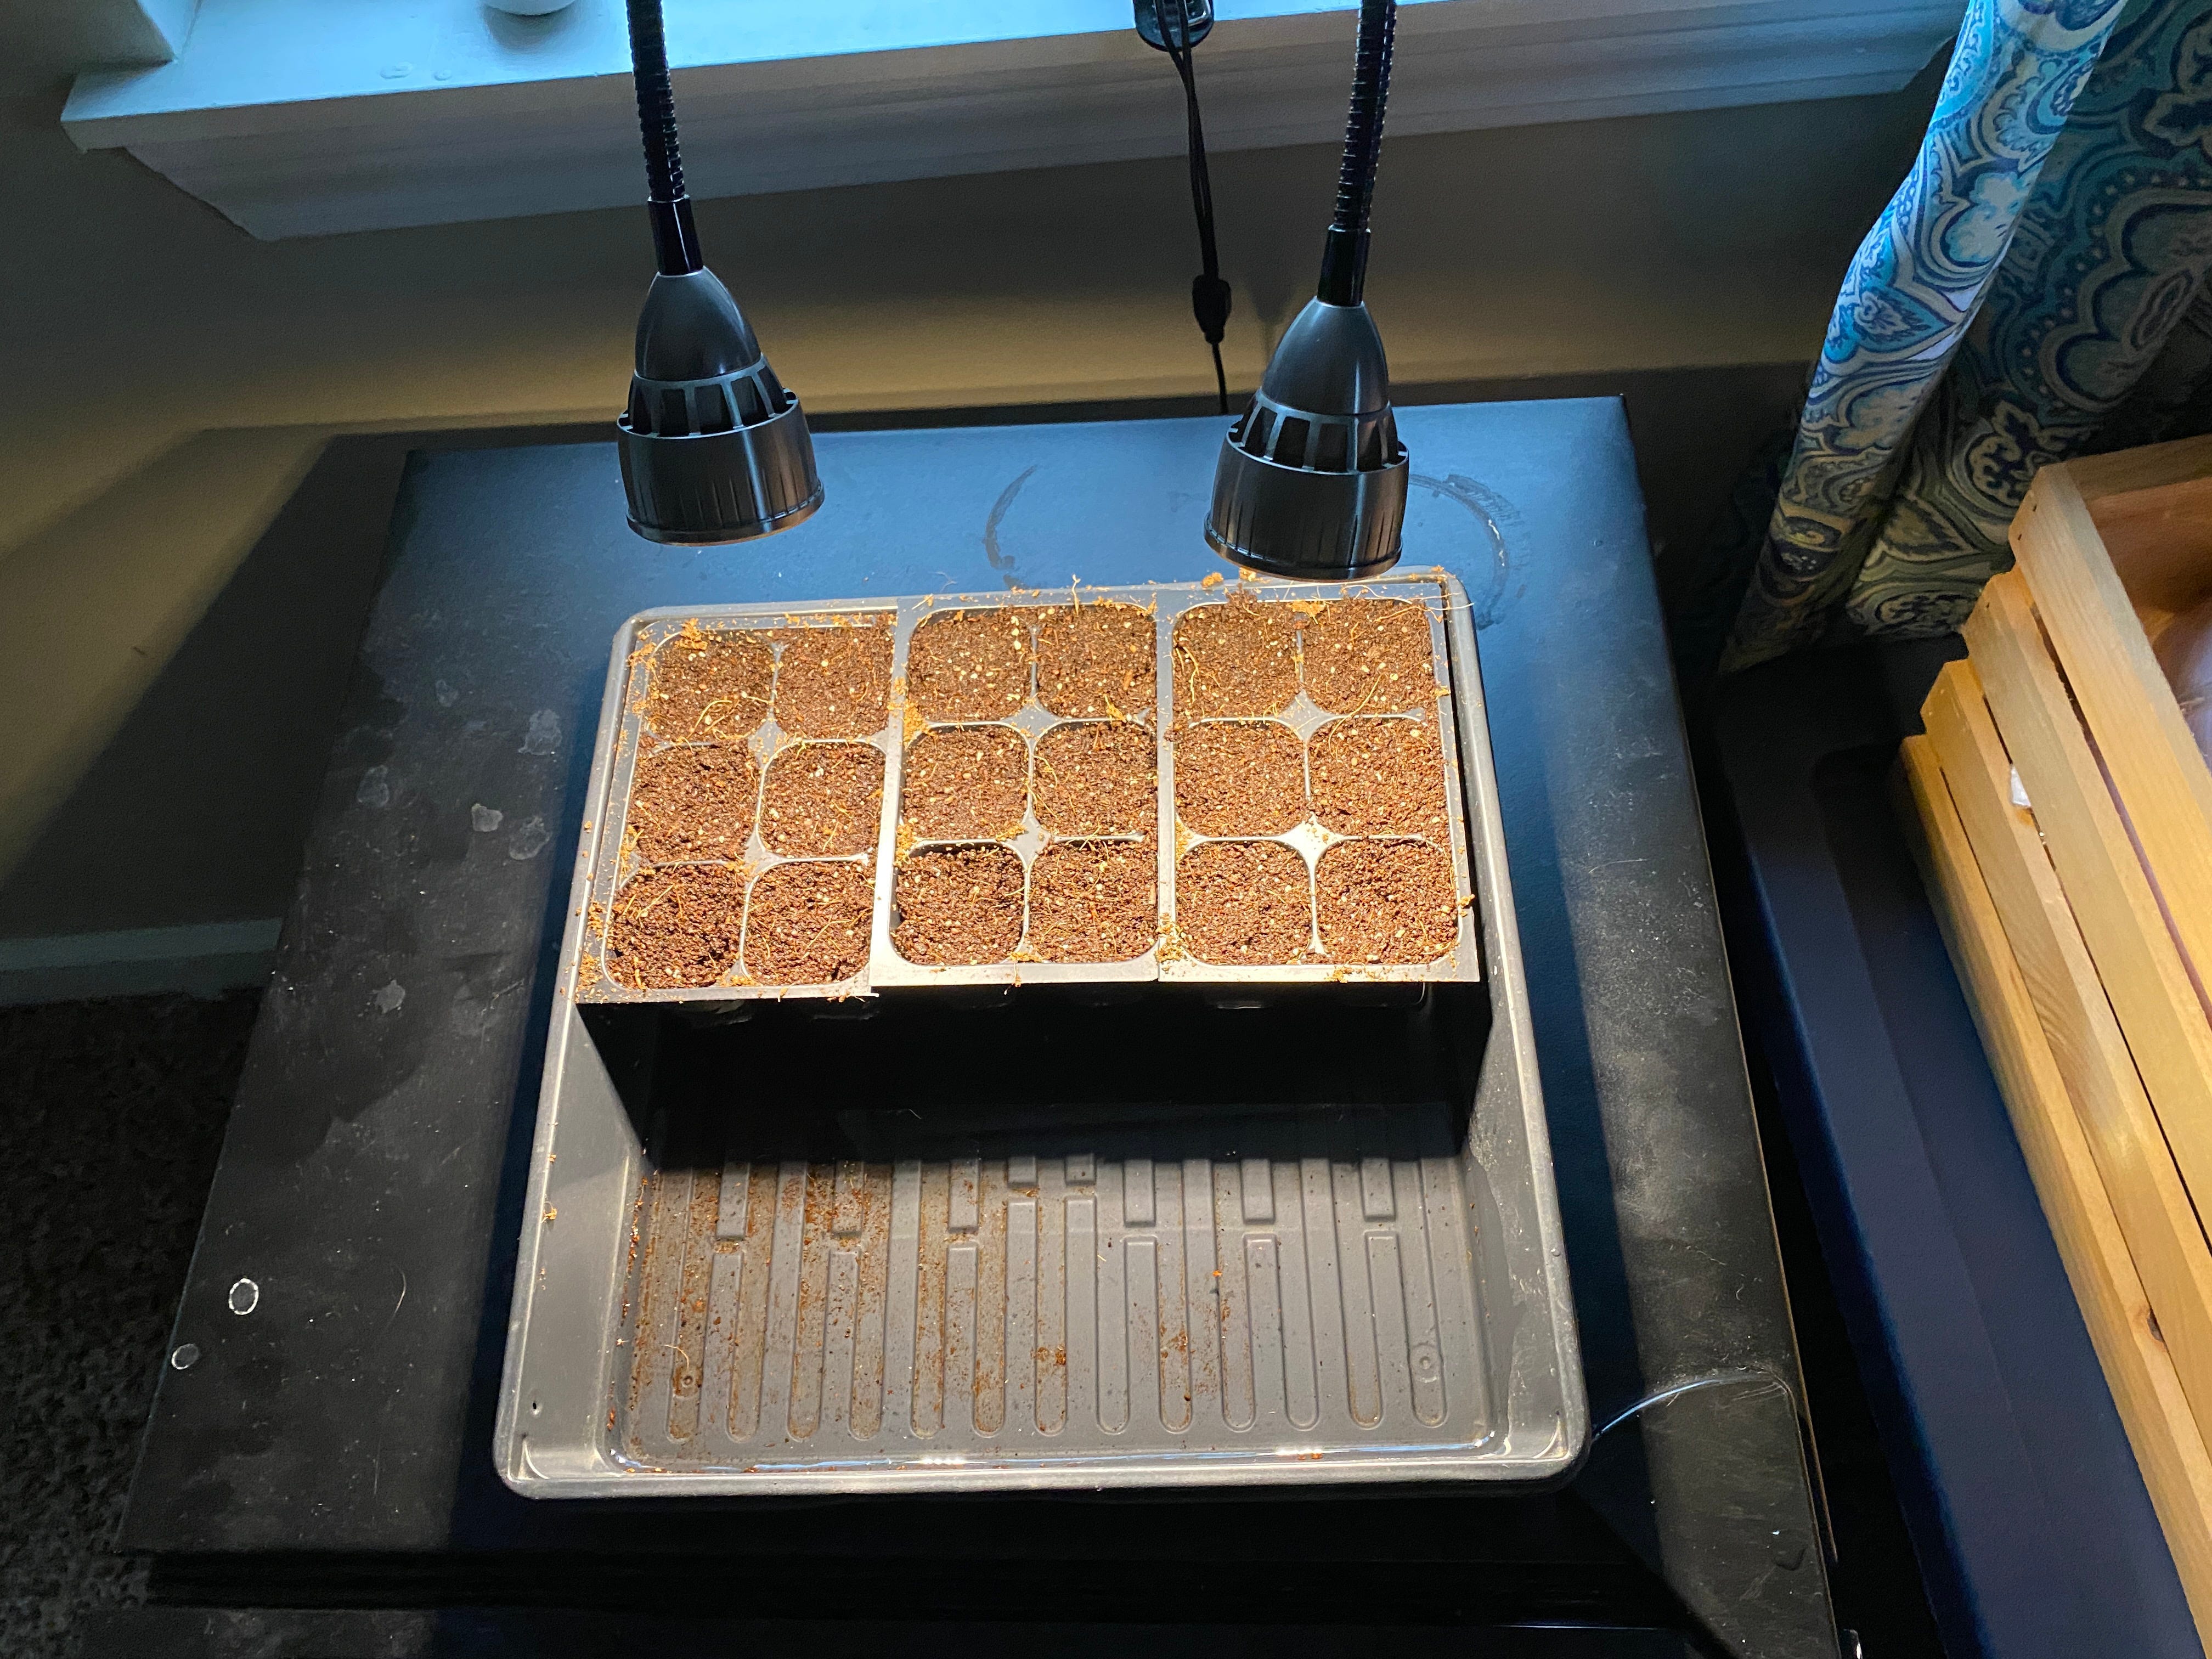
Once everything is planted, find a good spot for your seed trays where cats and kids can’t knock them over. You also need something you can clip your grow light to. We keep a mini-fridge in our bedroom. I moved it close to a window so I could clip the light to the frame.
Once the trays are in place, position your light (or lights) as close to the trays as possible. Some seeds, like lettuce, need light to germinate.
The light I linked to has a timer. You want to aim for 12-16 hours of light per day or so. Indoor seedlings need a lot of light, but they also need time to rest.
You want as much light on your seedlings as possible or they’ll grow “leggy” — long, thin, frail plants stretching to get more light. You can fix leggy when you transplant by burying the plant as deep as possible so only the top is above the surface, but it’s better to prevent it.
You may put a lamp or other light source near the plants, and/or move them close to a window to flood them with light. I’ve also used a chicken brooder lamp (with a regular bulb and the guard removed) to give them extra light, though it’s harder to position than the grow light I used here.
If you want to get fancy, you can use a smart outlet like a Wemo Mini to control the lights or set them up on a timer. (I also wrote a book on Apple home automation if you’re interested.)
Finally, fill your plant tray with water by lifting out one seed tray, adding the water, and then putting the seed tray back in. Every few days, check the plant tray to make sure it still has water. Do not let your soil dry out!
If you’re serious about starting seeds, you can buy a shelving unit to hold the seed trays and then hang a shop light under each shelf to light the plants. With the chains, you can adjust the height of the lights so you can raise them as the plant grows. (These products are suggestions, I haven’t used them myself, but I believe the shelf and light will work together.)
Gardener Scott has an excellent video about this:
Gardening Can Be Brutal
Remember how I told you to put a pinch of small seeds in each cell? There are two reasons for that:
Tiny seeds are hard to grip, so it’s easy to just dump a few in a cell.
Some seeds won’t germinate, so you increase your odds.
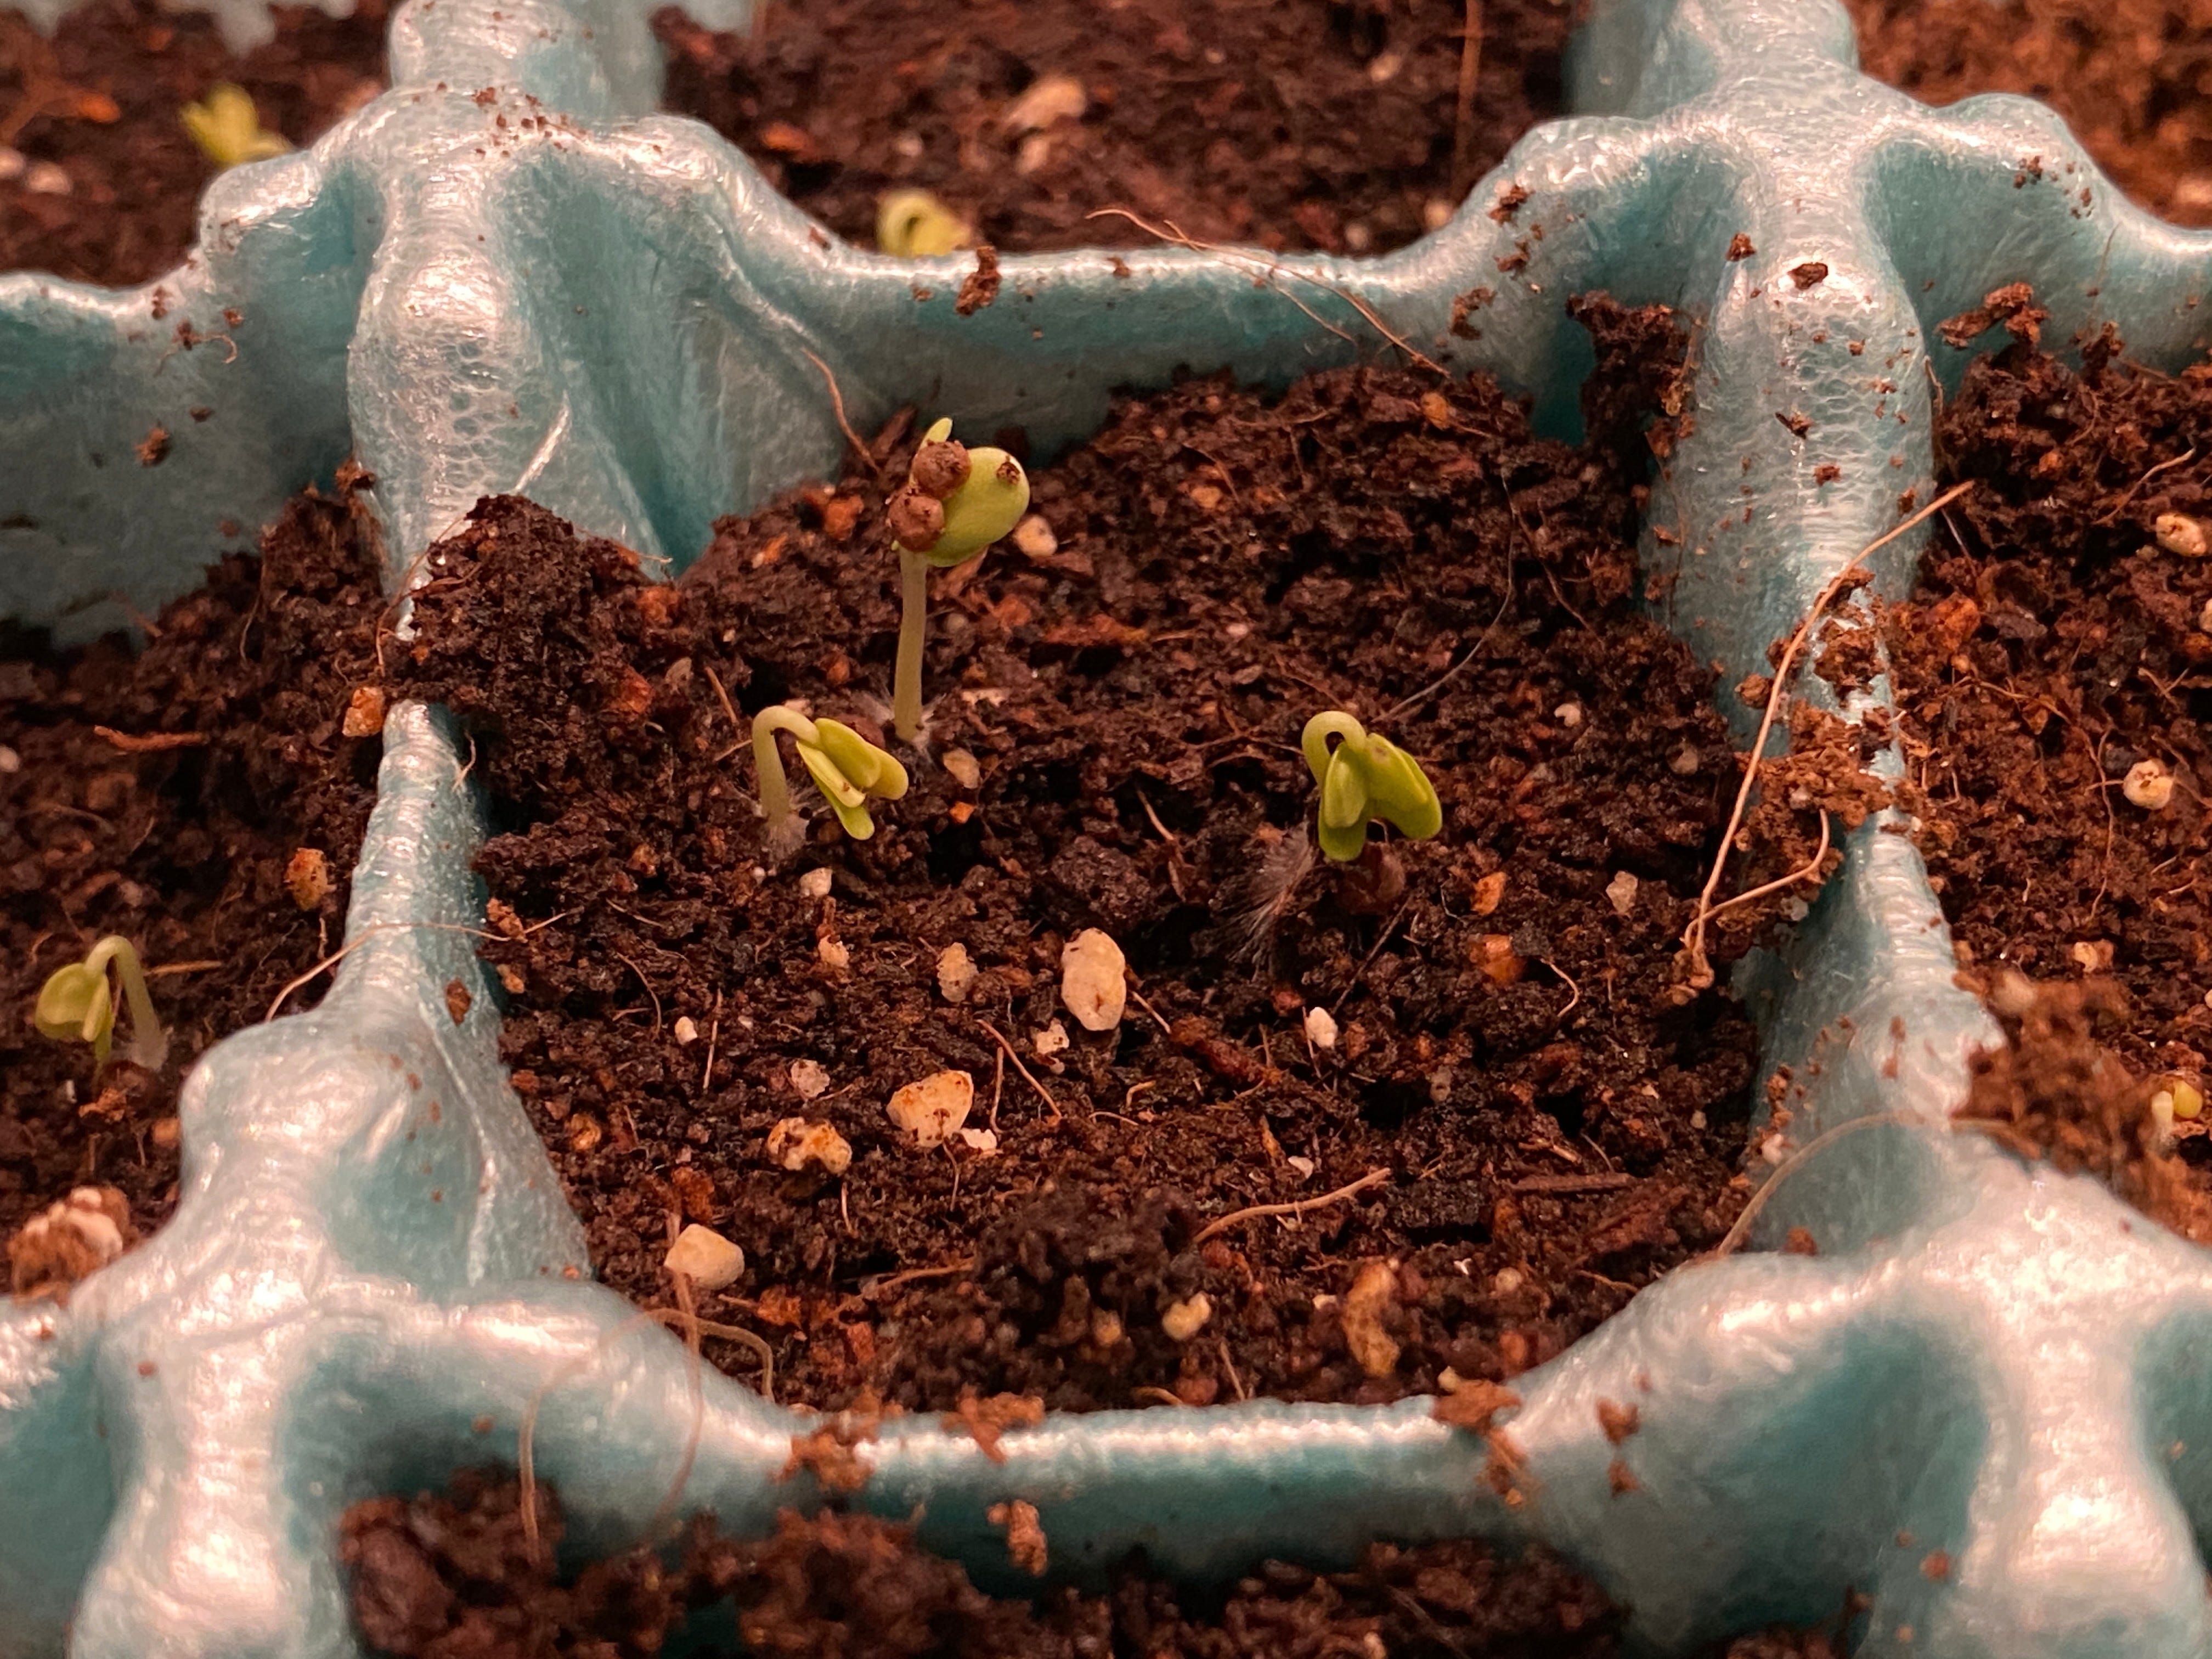
After a few days, you should see some plants start to germinate. Good news! Some cells may have more than one plant growing. Bad news. Kind of.
Alas, there can be only one… in each cell. This seems counterintuitive, but the plants will compete for resources and won’t grow into bigger plants. So you must choose some to sacrifice. Only the strong survive.
Don’t think of this as a waste of seeds, but a way to save time waiting for bad seeds that will never germinate. And time is everything in gardening.
I like tweezers for this. Choose the best-looking plant in each cell to leave alone and pluck out the rest. Grab each unwanted plant by the base of the plant and pull it out by the root. When you’re finished, you should have a plant in each cell.
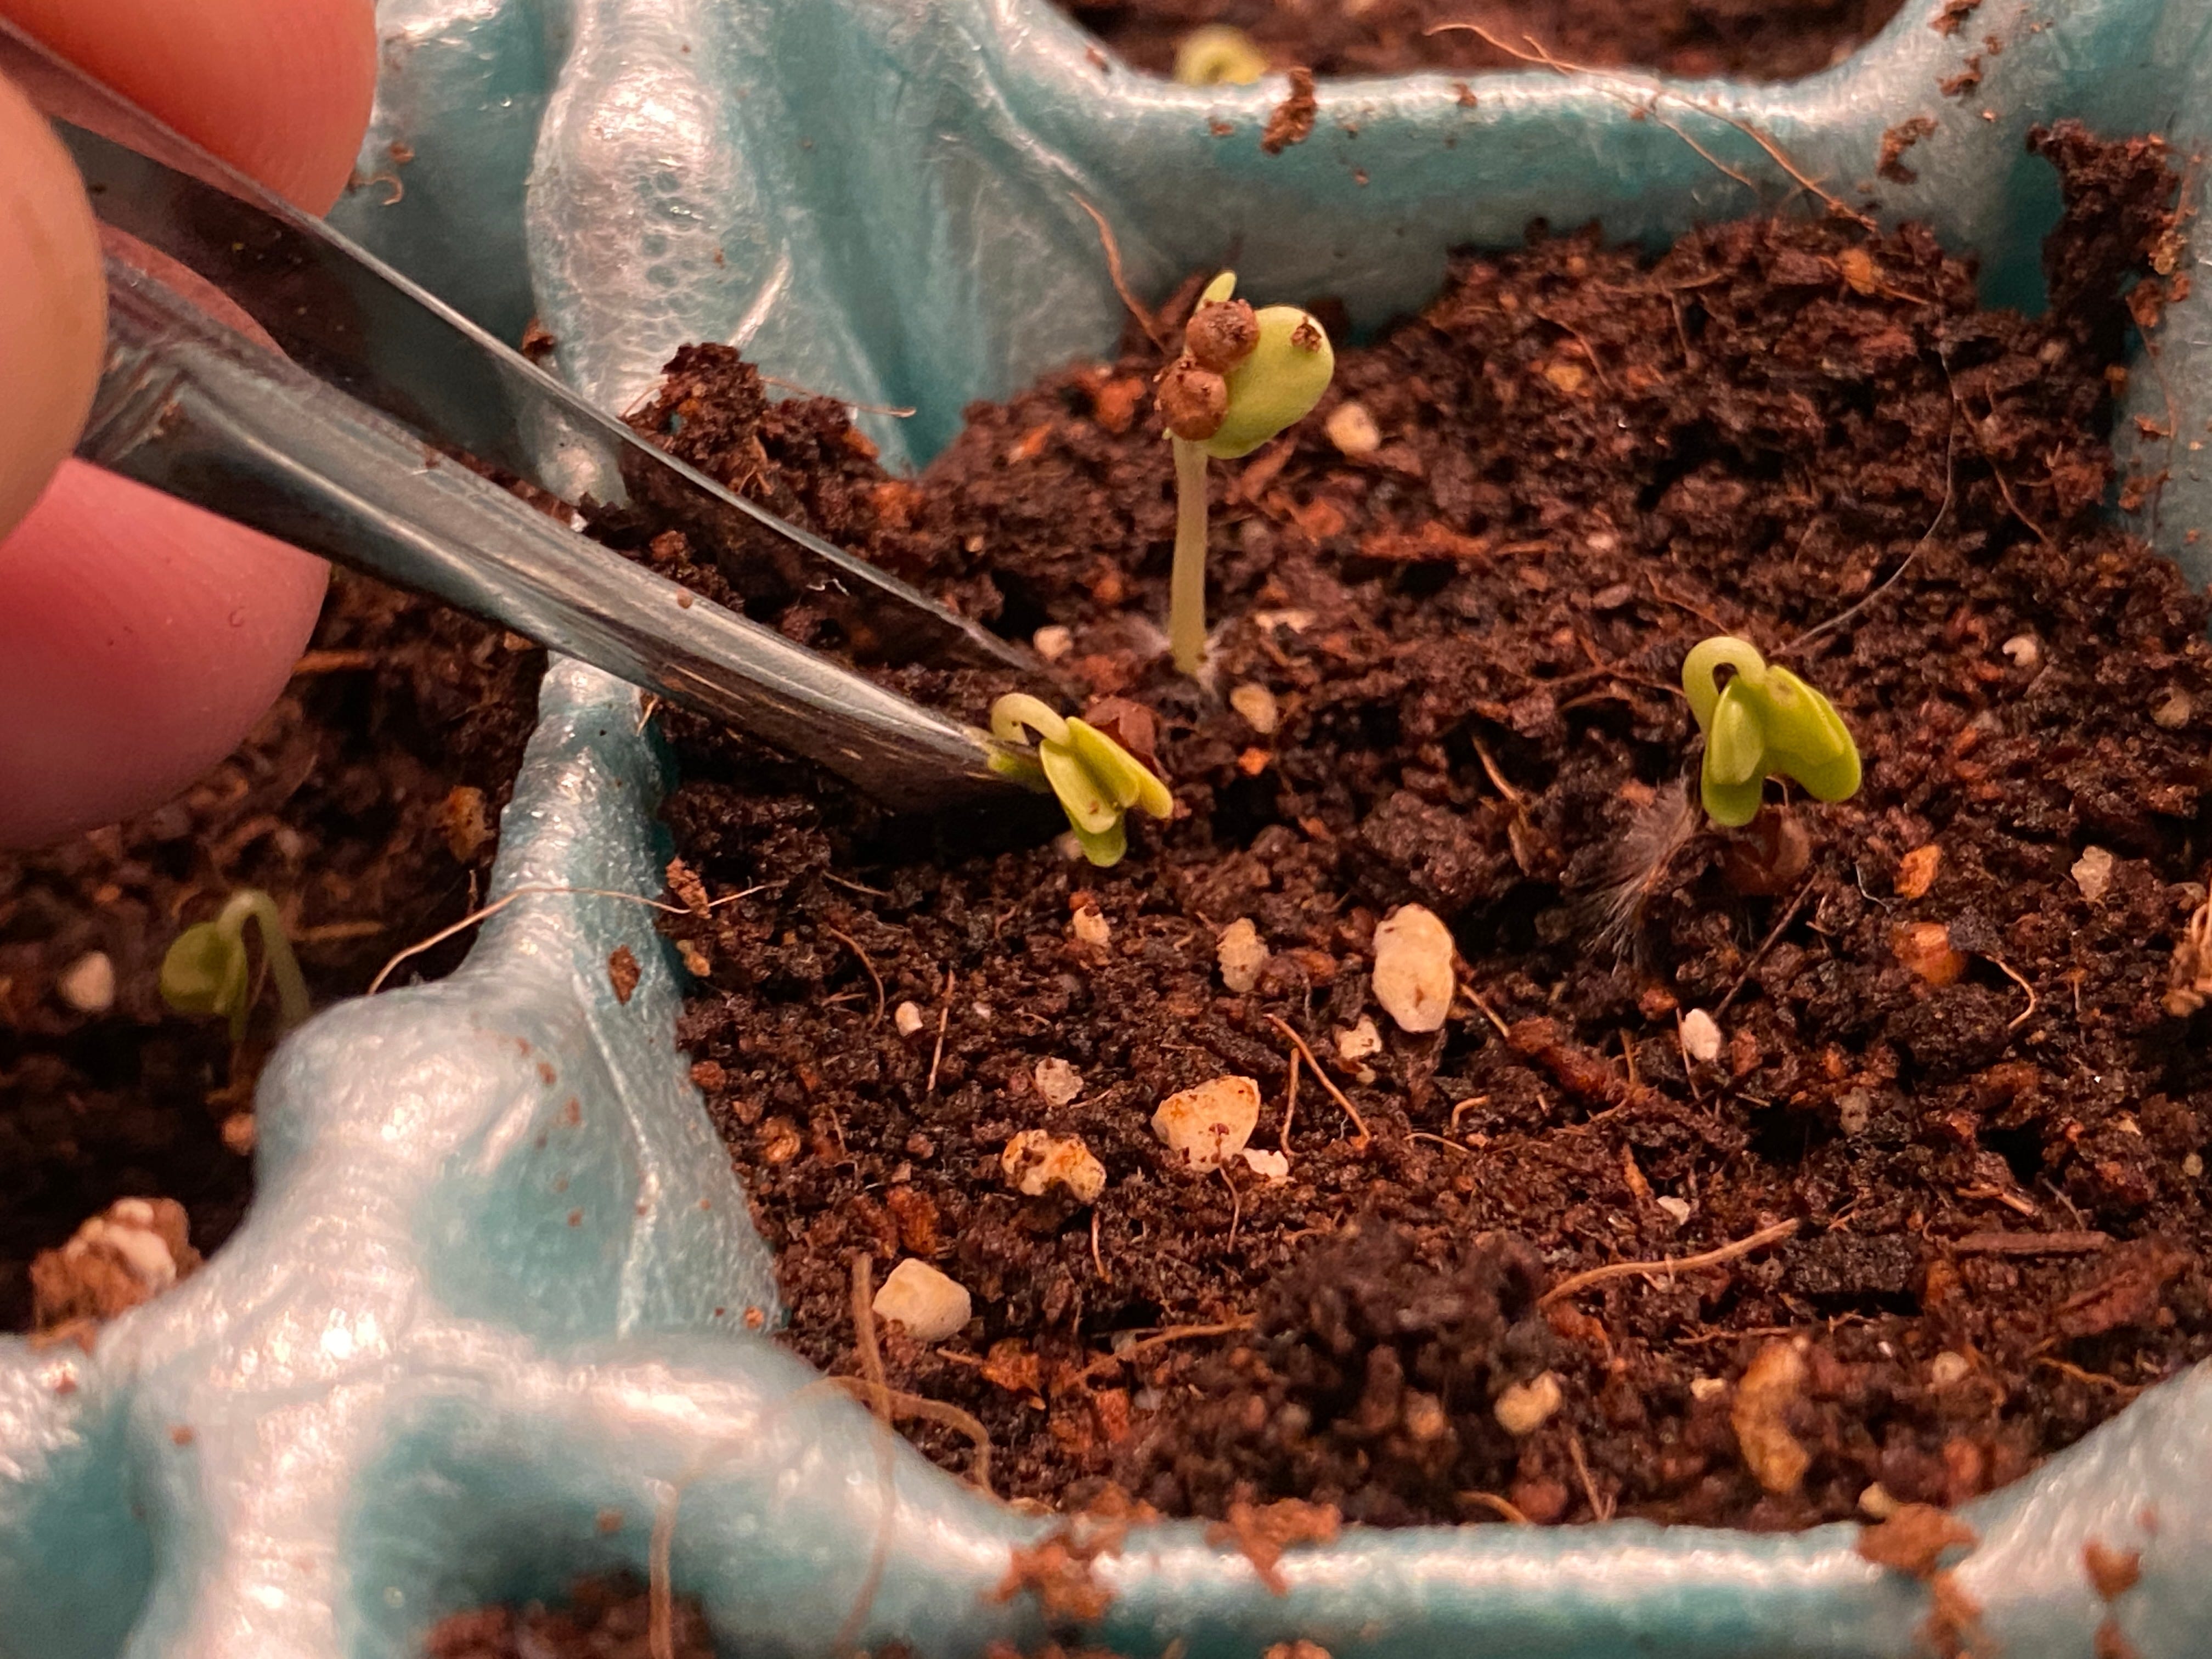
What if you have empty cells? Take your tweezers, poke a deep hole in an empty cell, and then carefully take one of your discarded plants and put it root-first into the hole.
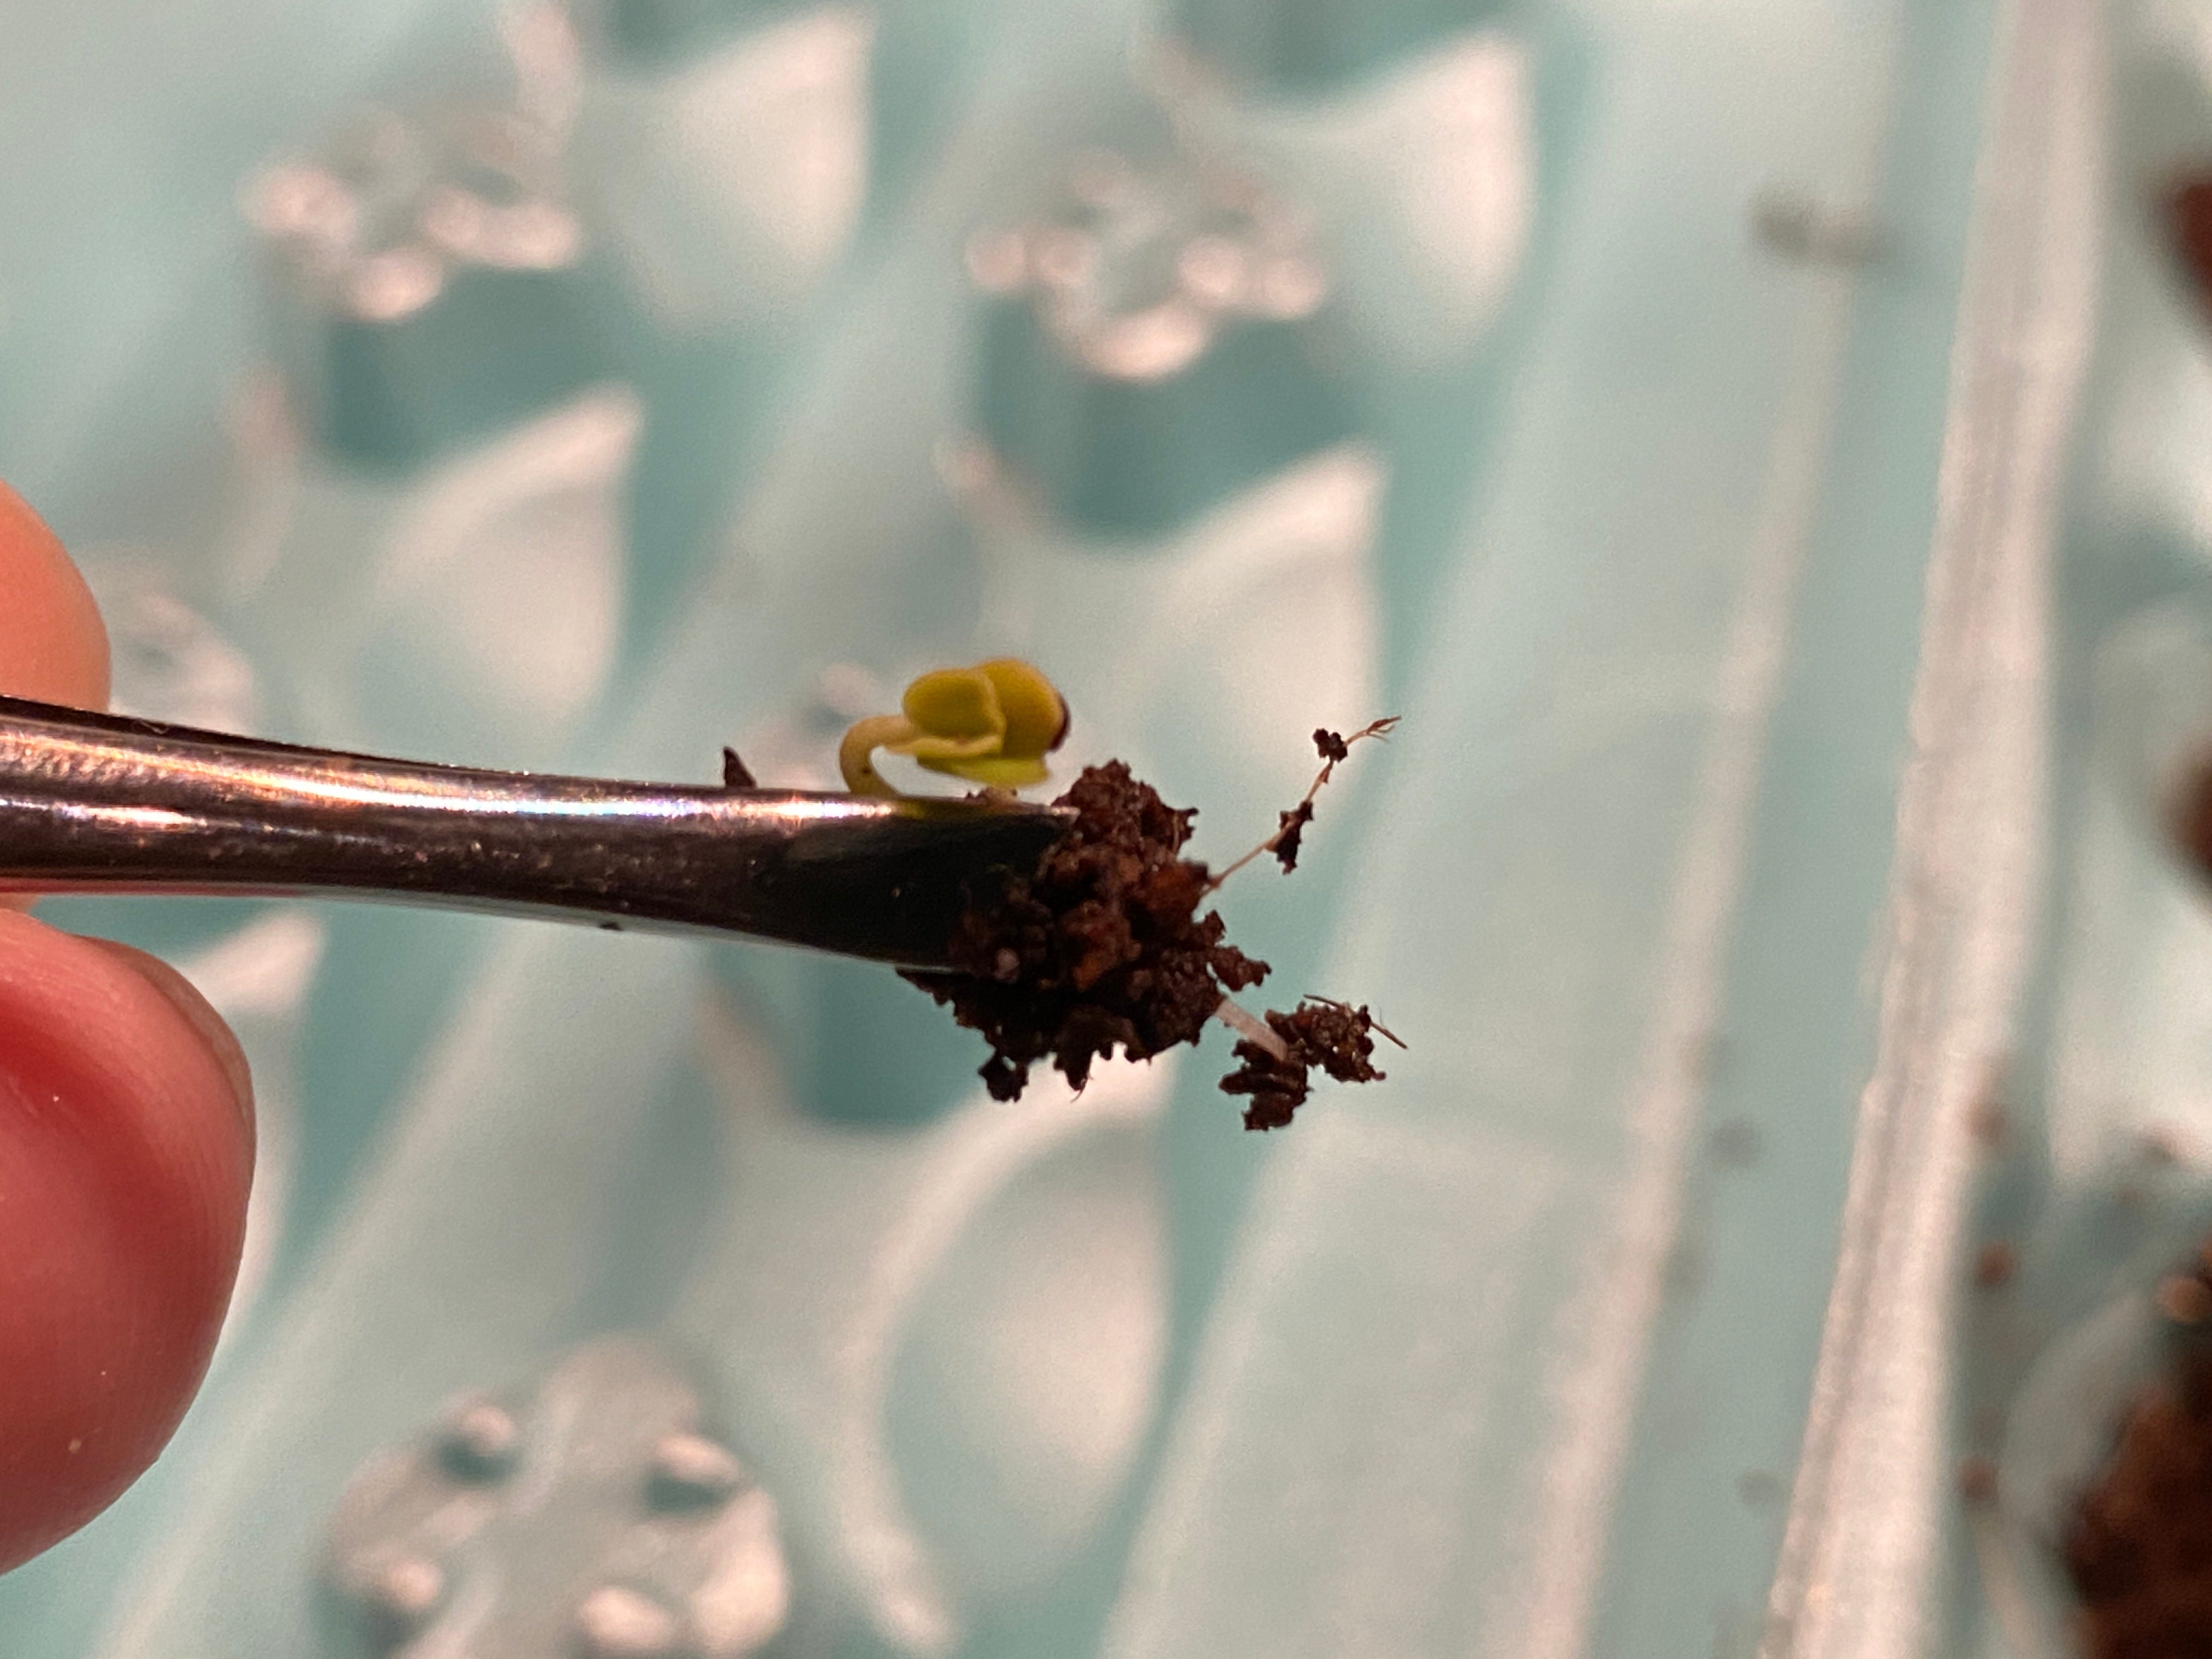
This process is tricky and you’ll probably fail a lot at first. It’s okay, you tried to save it. But it’s worth practicing because you’ll have more viable plants and less waste. You’ll get it right eventually.
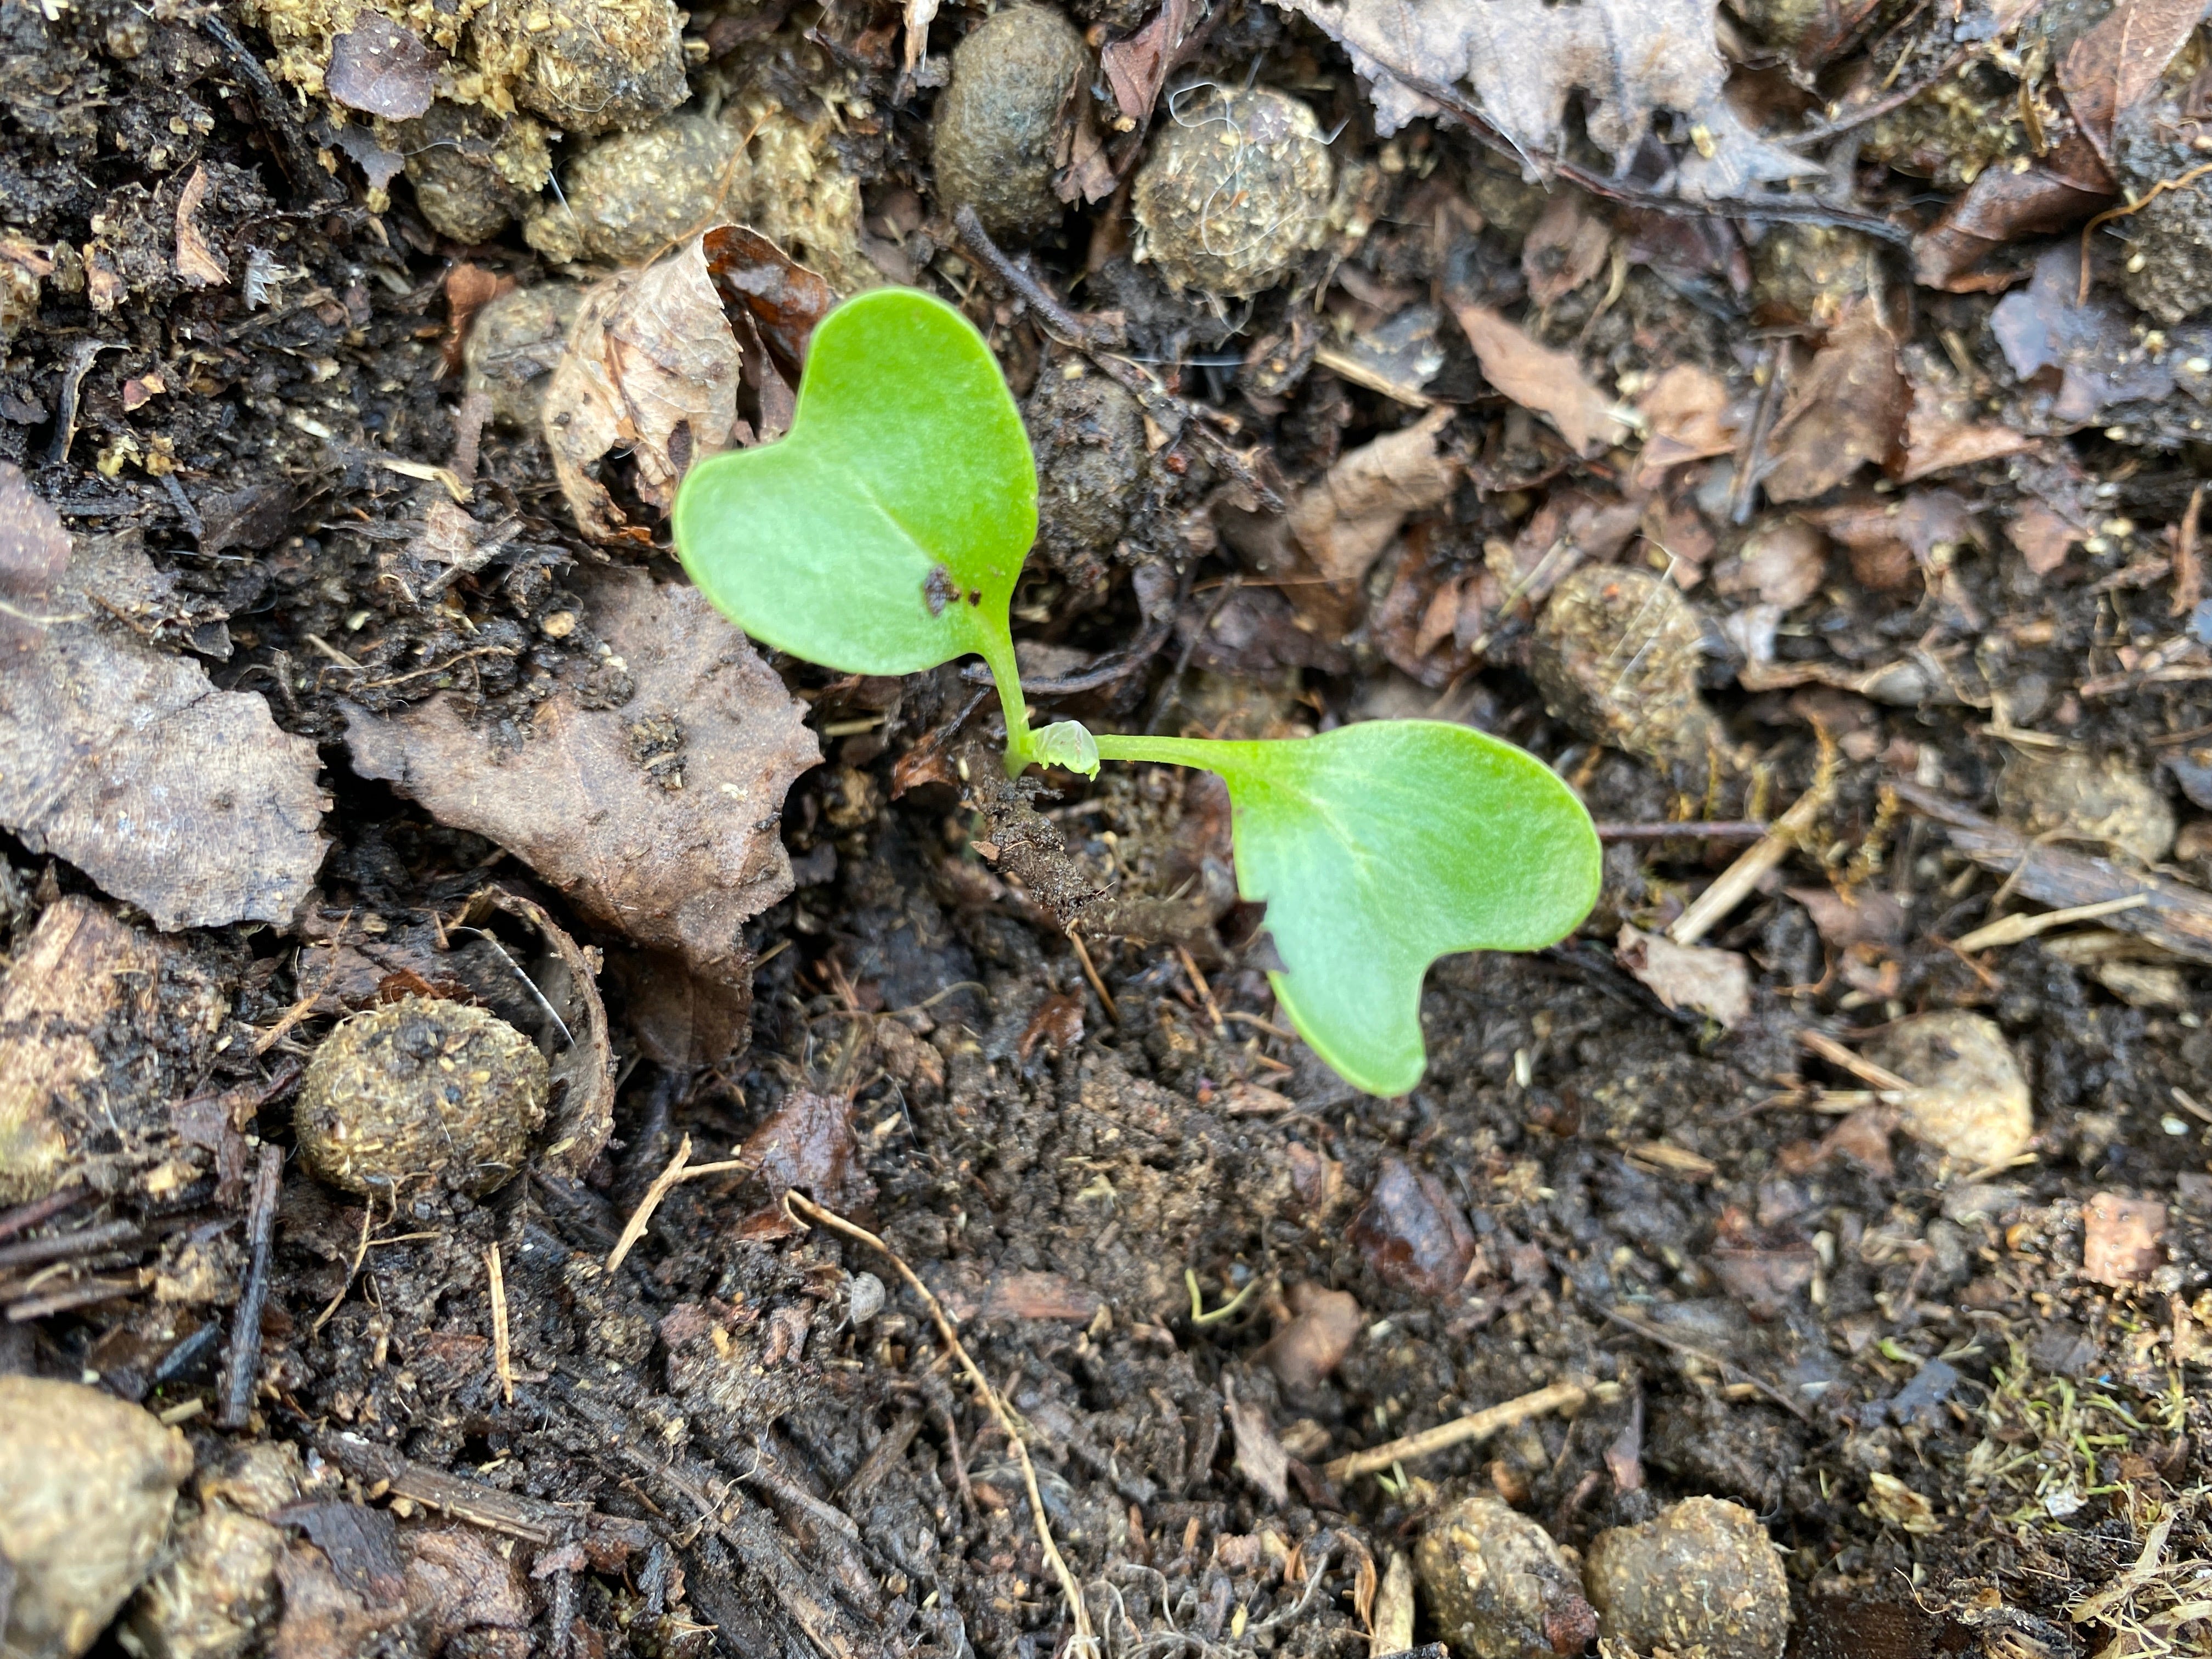
Tips for Transplanting
Before you move your plants into the garden, you want to harden them. They’re not used to wind or direct sunlight, and they need a little time to adapt.
On a nice day, take some plants and put them in the shade outside for about an hour. Then bring them in. The next day, leave them outside for two hours, but check them after an hour to make sure they’re not wilting. You get the idea. Slowly adapt the plants until they can handle being outdoors all day.
I sometimes get away without hardening if I plant in fall or early spring. But the intense Tennessee sun and heat will melt any unadapted plant.
Once they’re hardened and the time is ripe, you need to make a hole in a garden bed for the plant. You can use a spoon, but you’ll save a lot of trouble with a Hori Hori knife, which combines several tools into one:
A narrow shovel
A saw, for trimming plants
A measuring stick, handy for plant depth and spacing plants
To make a hole for a plant: shove the knife into the soil and rock it back and forth. The scooped shape of the knife will make a perfect little hole.
You want to fill your hole with water before you put in the plant. I also like a scoop of rabbit manure and some stinging nettle tea for fertility. More on those wonderful substances in the future.
The proper way to remove a plant from its cell is to push the bottom up so it pops the plug of soil out with the plant intact. That’s another reason to keep your soil moist: so it stays together when you pop out the plug.
From there, simply set the plug into the hole. This takes practice. If your seedling is leggy, put it in deeper so the thin stem is protected from the elements. The plant may grow to be big and strong after all.
But, wait! What if you started seeds too soon and they’re not ready to go outside? Throw some potting soil into a disposable party cup and transplant into that. Keep them under light and remember to keep the soil moist. Potting soil has plant food in it, so your plants should stay alive and keep growing until you’re ready.
Come join our Discord community and tell us what you’re growing!
Great article.